




Paste a URL, click connect, authorize an app, and an AI agent has already read your product and opened its first change to a one-pager sitting in your own GitHub repository. That's the entire setup for a version-controlled product context layer inside Product Map. This walkthrough follows every screen in that flow, not only the high points, because it's the details, which org to pick, which scope to grant, when the folder structure actually shows up, that trip people up.
The architecture behind it is simple to describe and easy to underrate. One Git repository holds your product's context, one-pagers, strategy docs, PRDs, the prompts your agents use, all as plain-text Markdown.
Every agent reads from that same repository before it drafts anything, so a strategy agent, a research agent, and a delivery agent all work from one current version of the truth instead of three different pastes of your product brief. Every change an agent proposes lands as a diff you review before it becomes part of that truth, the same discipline engineering teams already apply to code.
What follows isn't a chat log. It's a version-controlled source every agent, and every teammate, can trust, and this walkthrough builds it in four phases: create the project, seed it with context, connect GitHub, and put the repo to work.
1. Start a new project
A project is the container Product Map binds to a single GitHub repository a few steps from now. Getting it named and scoped correctly here saves rework later, so start with onboarding and end with a project that matches the product you're building context for.
Complete the onboarding
Every new Product Map account lands on the same quick-start screen. It lays out three steps before you touch a repository: create project context, run AI agents, and set up version control. Below that sit two optional paths for a PM skills snapshot, which have nothing to do with GitHub and can be skipped for this setup.
Click Start using PM agents to move past onboarding into the project view. If you've already been through onboarding once, this screen won't reappear, and you land straight in your project list instead.

Add a new project
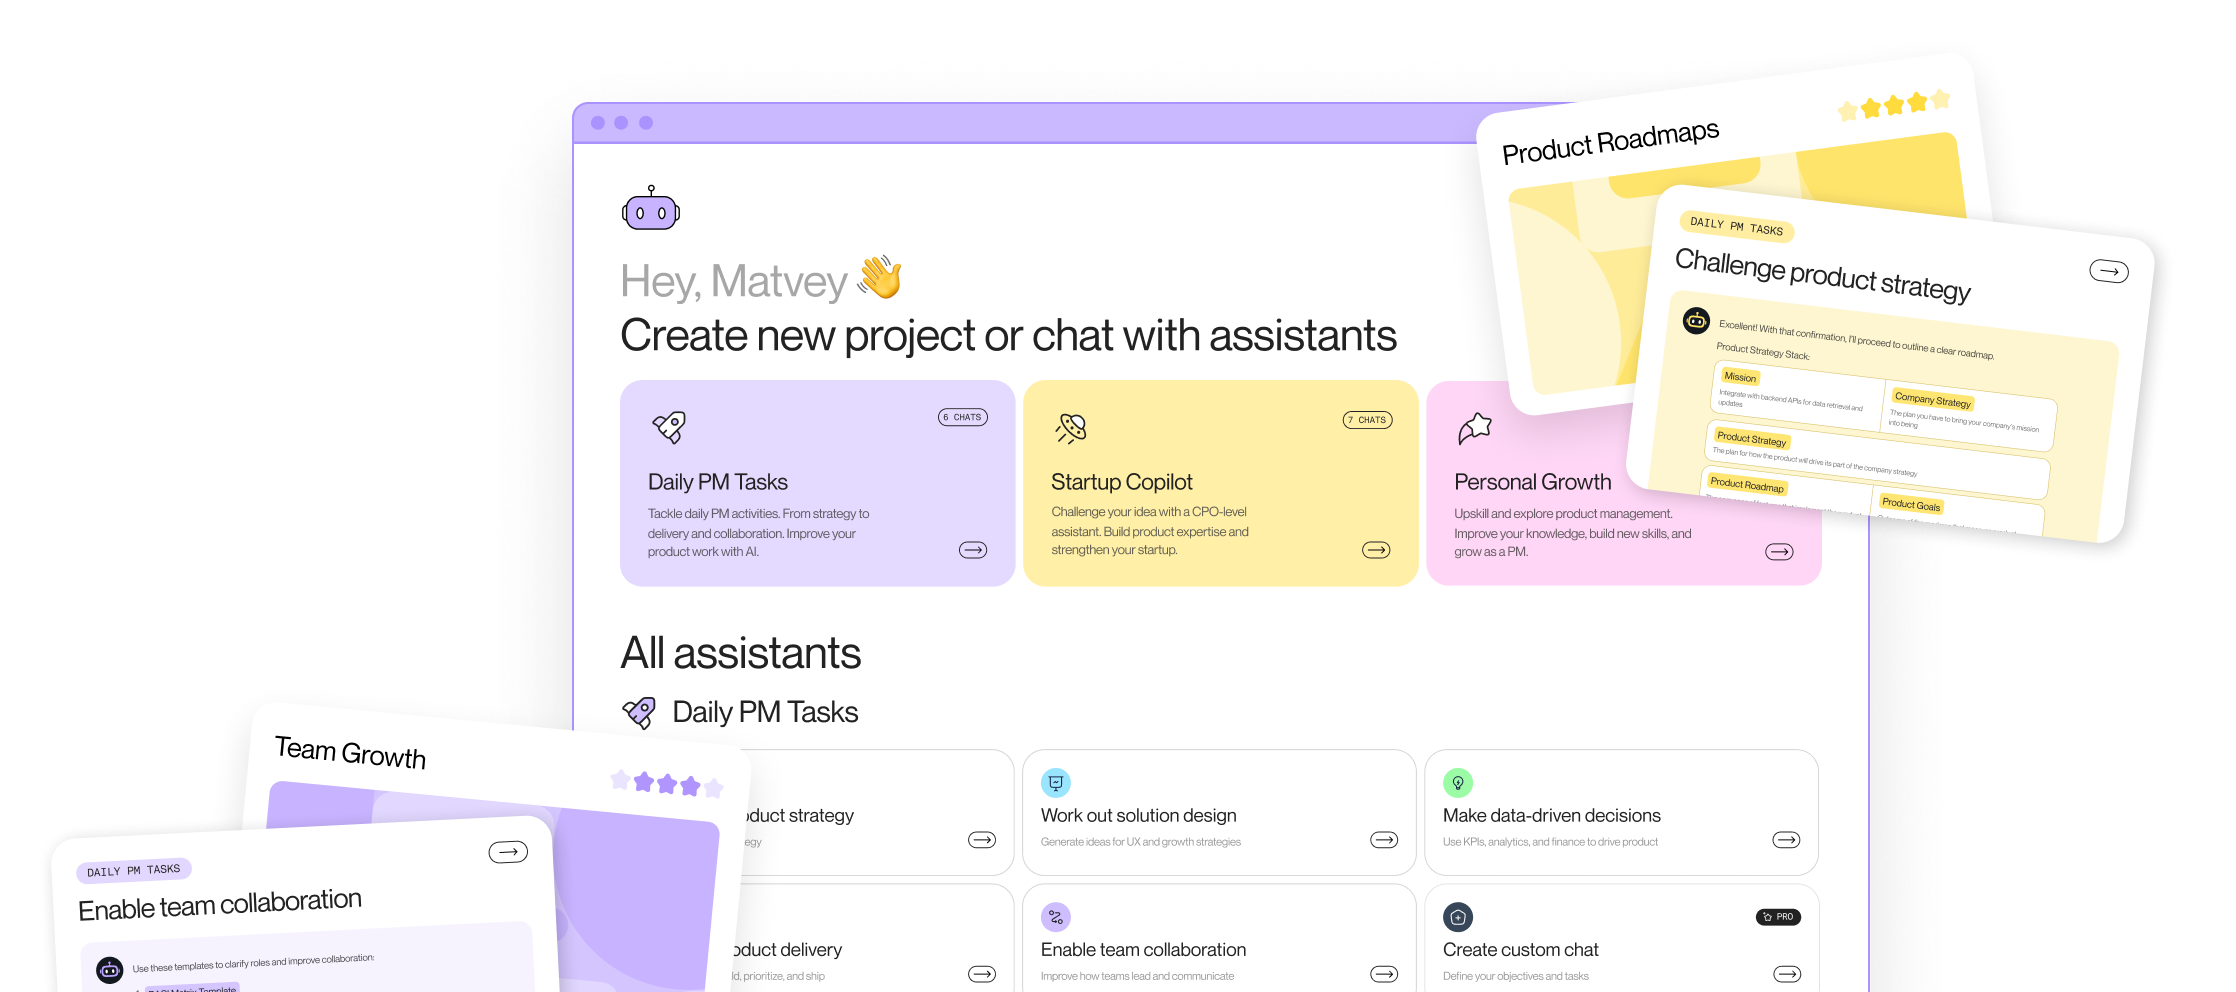
The next screen greets you by name and offers three workspace types: Daily PM Tasks, Startup Copilot, and Personal Growth, each bundling a different set of agents. Below them sits a flat list of every agent available without a full project setup.
Pick the workspace that matches what you're building context for, then click Add project in the left sidebar. Name it after the product itself. A project is the container that binds to one GitHub repository a few steps from now, so one product gets one project, not one project per team or initiative.

2. Add your product context
Before any agent touches your repository, it needs to know what you're building. This phase seeds that context once, up front, either pulled from your product's website or filled in by hand.
Add your product's website
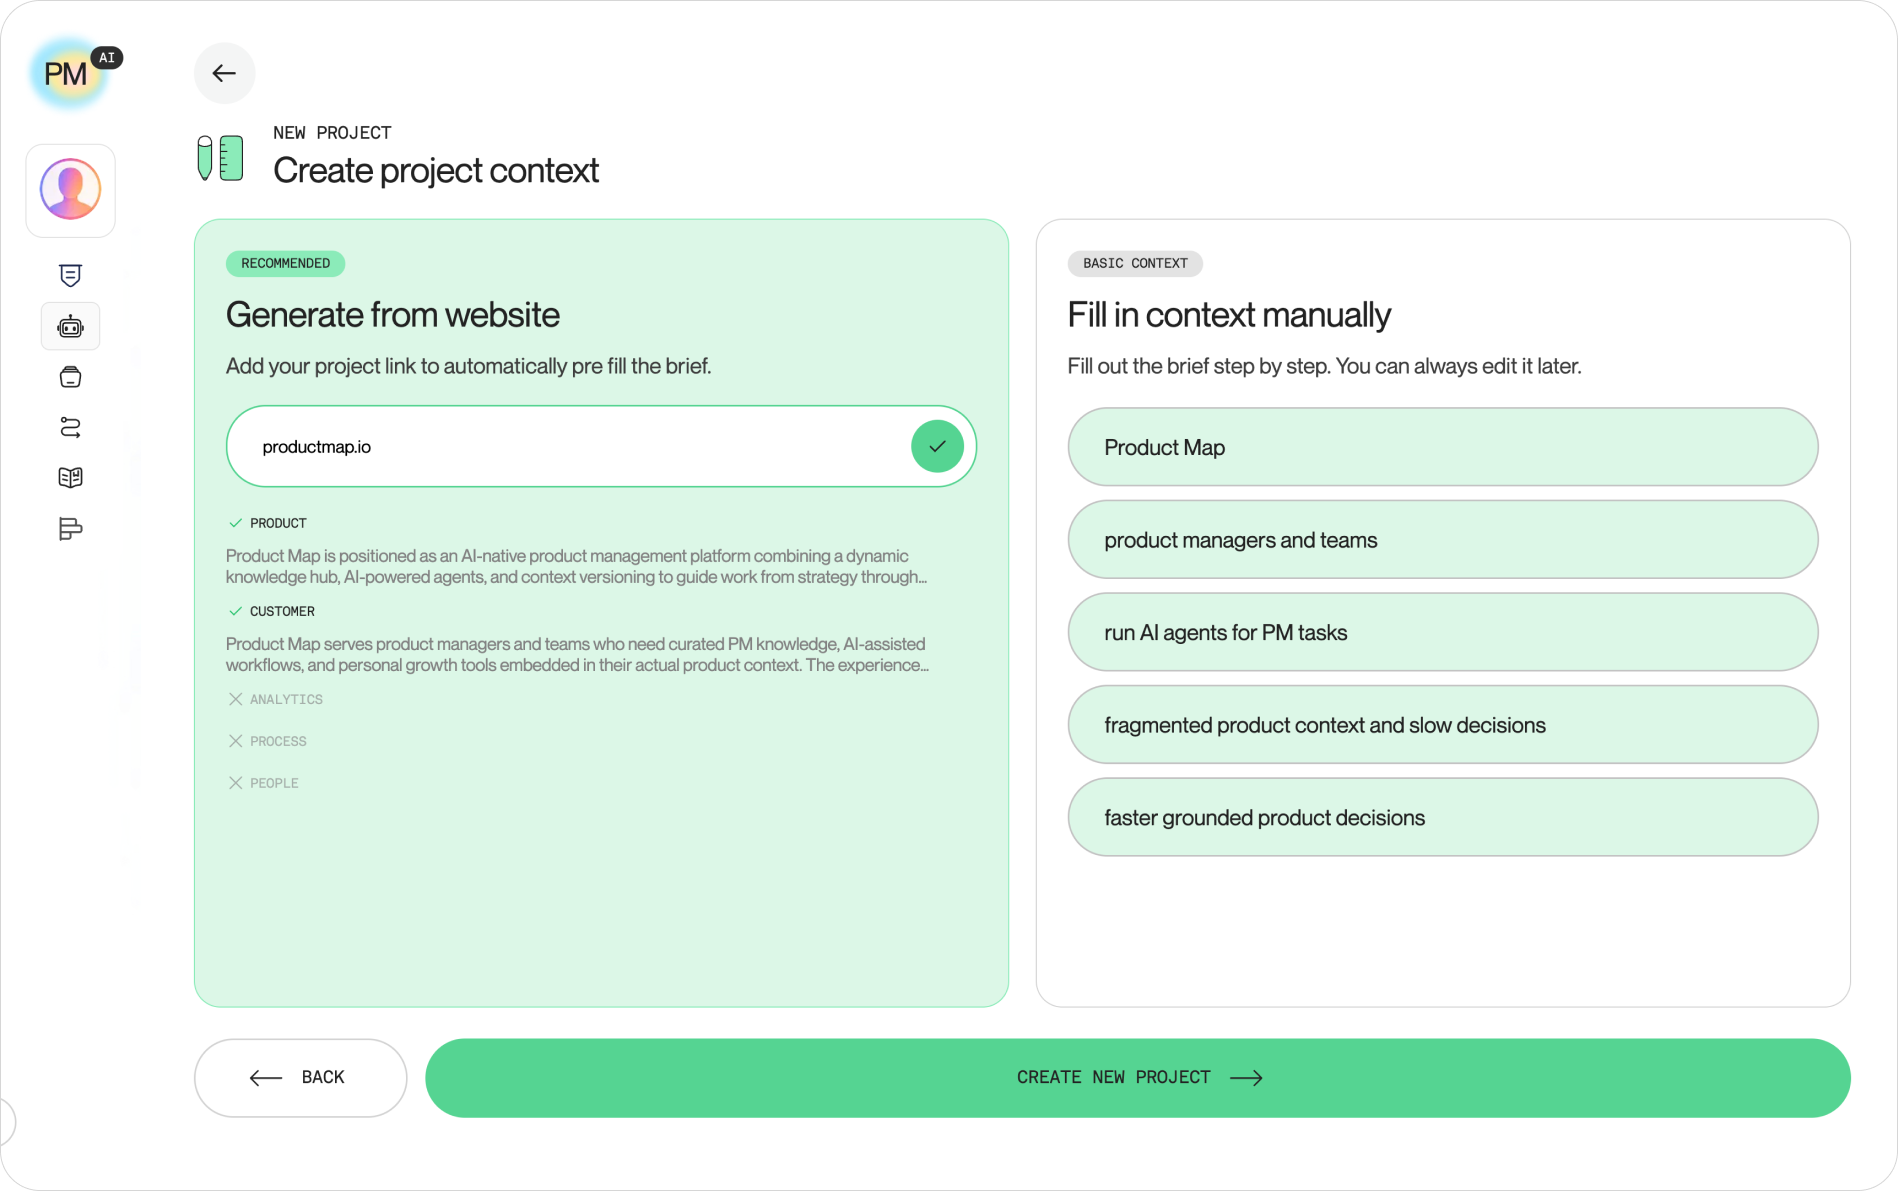
Creating a project opens a two-column choice: generate context from a website, or fill it in by hand. The website option calls out to your product's site and pulls a summary the way a person skimming the homepage would, positioning, audience, the problem it solves, then drops that into the brief for you to review.
Type your domain into the Generate from website field and confirm. Product Map calls out to your site in the background and starts filling the brief while you wait.
Review what got extracted
Once the fetch finishes, Product Map shows what it found on the left, product summary and customer description with green checkmarks, and greys out anything it couldn't infer, like analytics maturity or team process, marked with an X. On the right, the same information appears as short editable fields: organization, target customers, product goal, pain point, and positive outcome.
Read through both sides before continuing. This is the only point in the whole flow where you correct the AI's read of your product before it becomes the seed context every agent works from afterward.
3. Link your GitHub repo
This is where the project turns into a version-controlled repository. Six screens, most of them on GitHub's own site rather than Product Map's, take you from a 0% progress bar to a repo the bot can read and write to.
Open your project dashboard
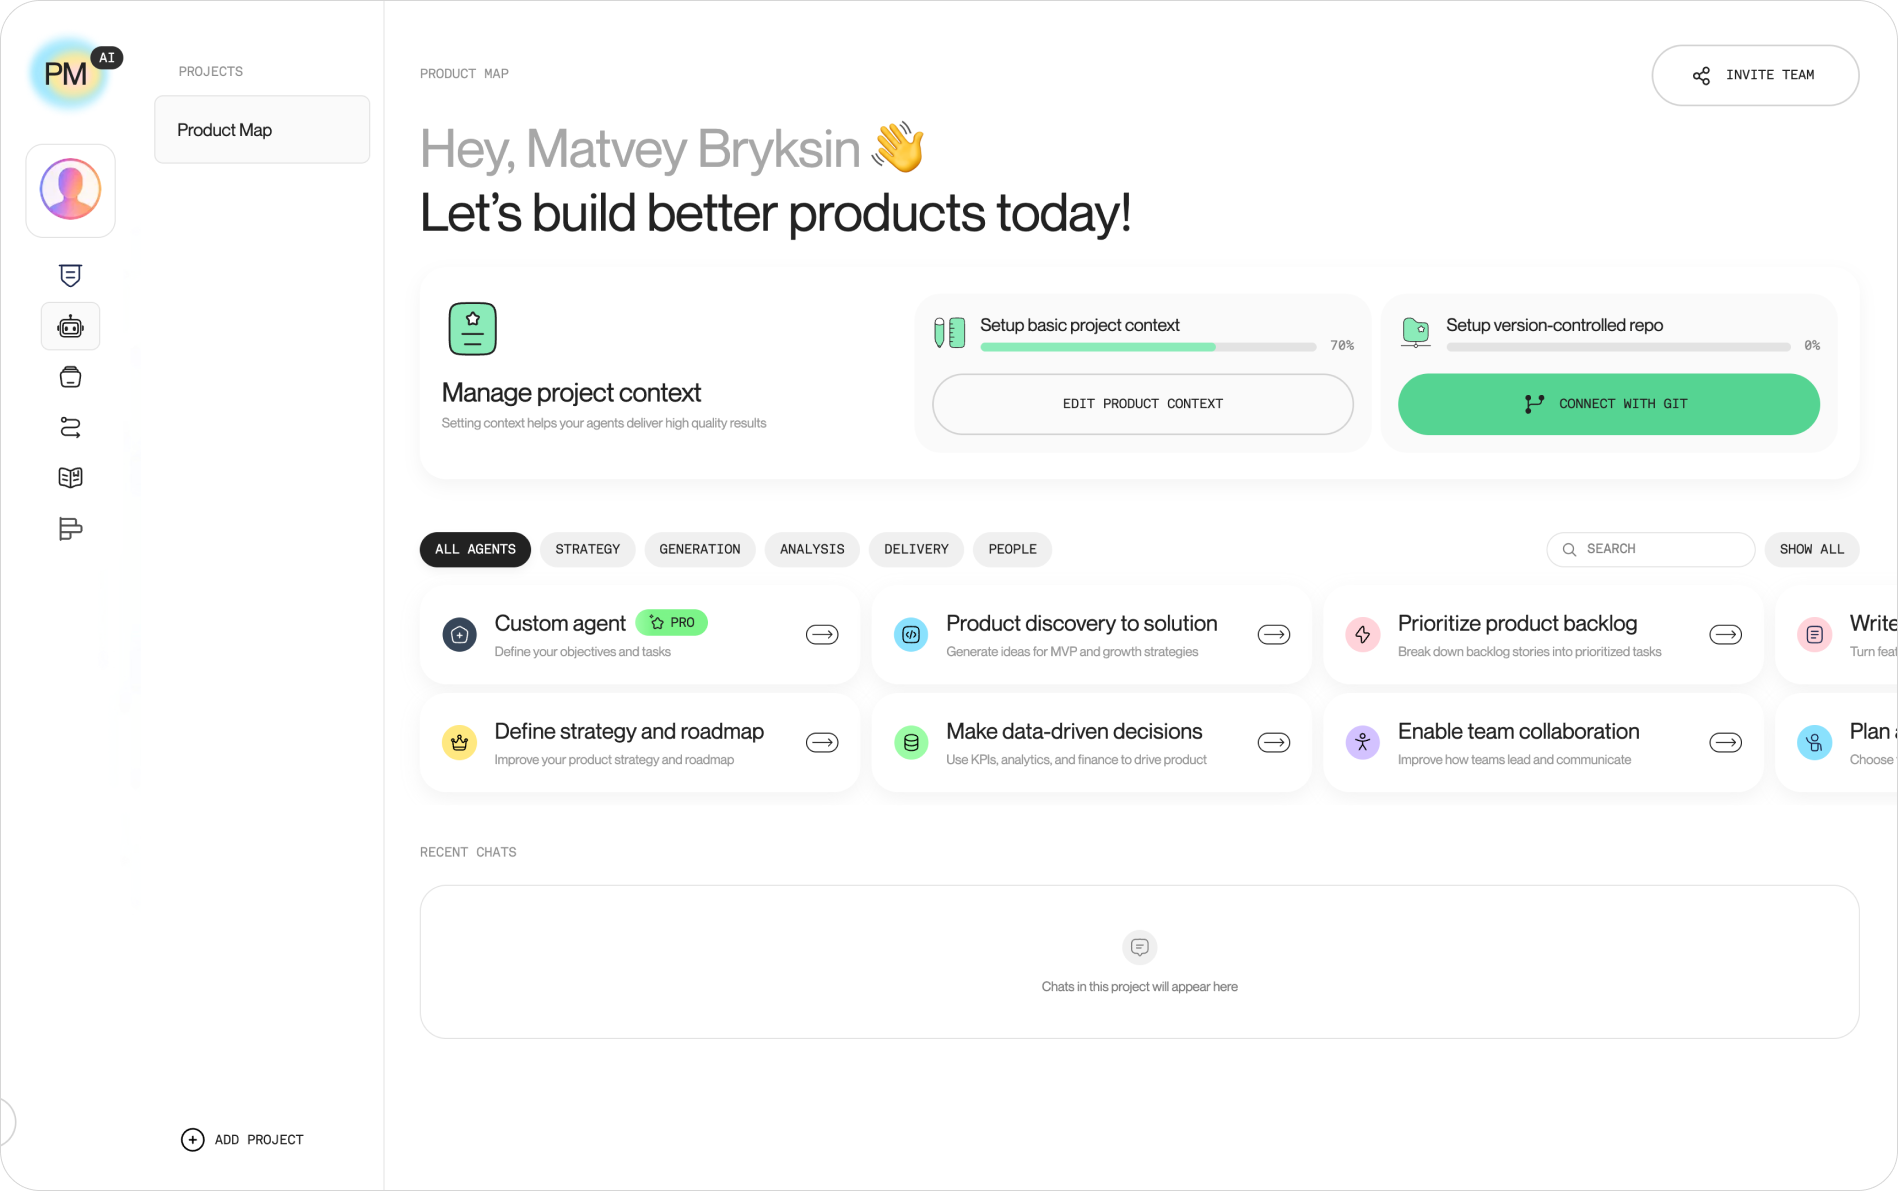
Your new project has a home screen with two progress trackers: Setup basic project context, already partway done from the step above, and Setup version-controlled repo, sitting at 0%. The second one is where the GitHub connection starts.
Click Connect with Git. The basic context bar doesn't need to hit 100% first; the two setups run independently of each other.
Choose your Git provider
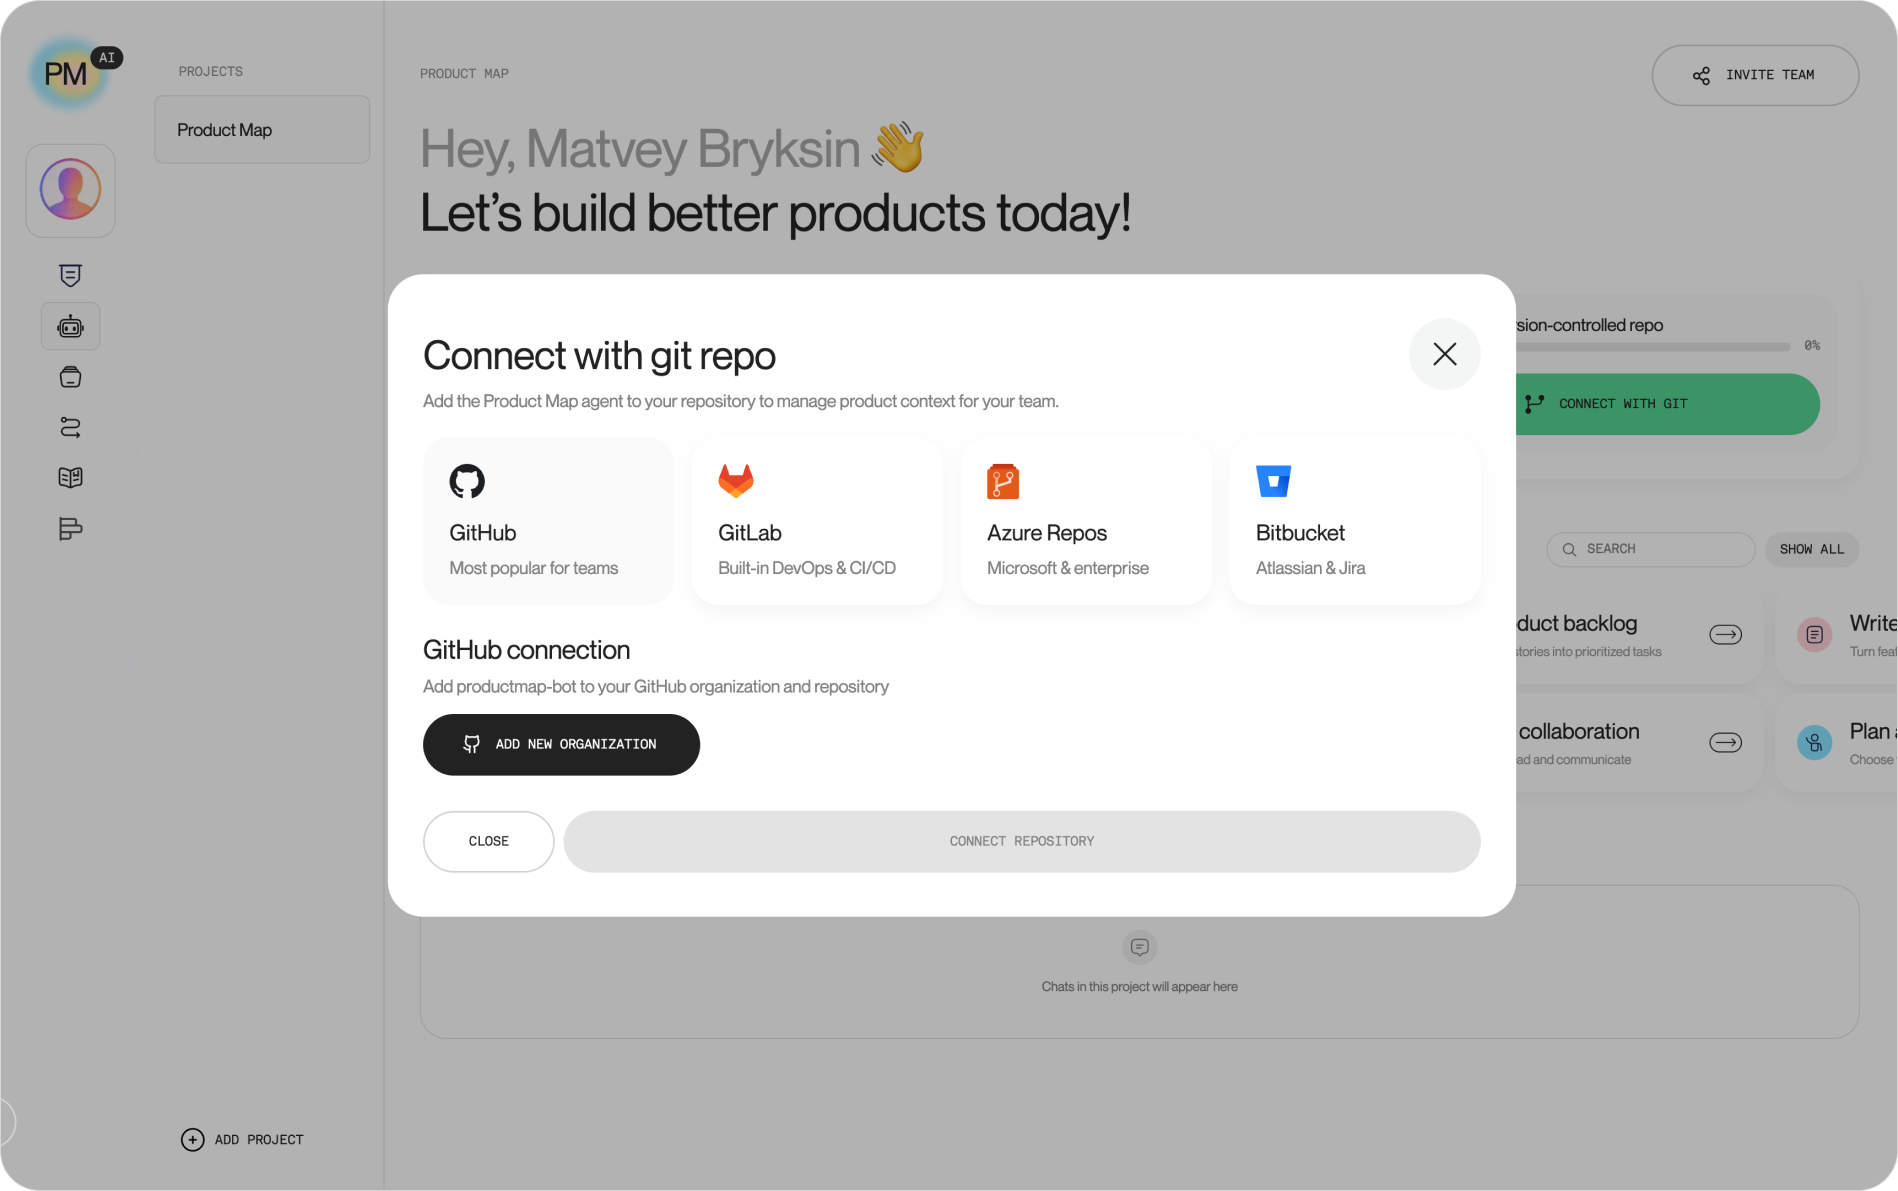
A modal opens with four provider options: GitHub, GitLab, Azure Repos, and Bitbucket. Product Map's flow is close to identical across all four; this walkthrough follows GitHub since it's the default and the most common choice for teams.
Below the provider icons, the GitHub connection section explains what you're about to grant: the Product Map bot needs to be added to a GitHub organization and a specific repository before it can read or write anything at all.
Install the bot on your org
Clicking Add new organization leaves Product Map entirely and opens GitHub's own installation flow. GitHub asks where to install the app, listing your personal account and every organization you belong to.
Pick the account or organization that owns the repository you want to connect. If you're a member of more than one org, this is the step where picking the wrong one sends the bot somewhere your team can't reach it.
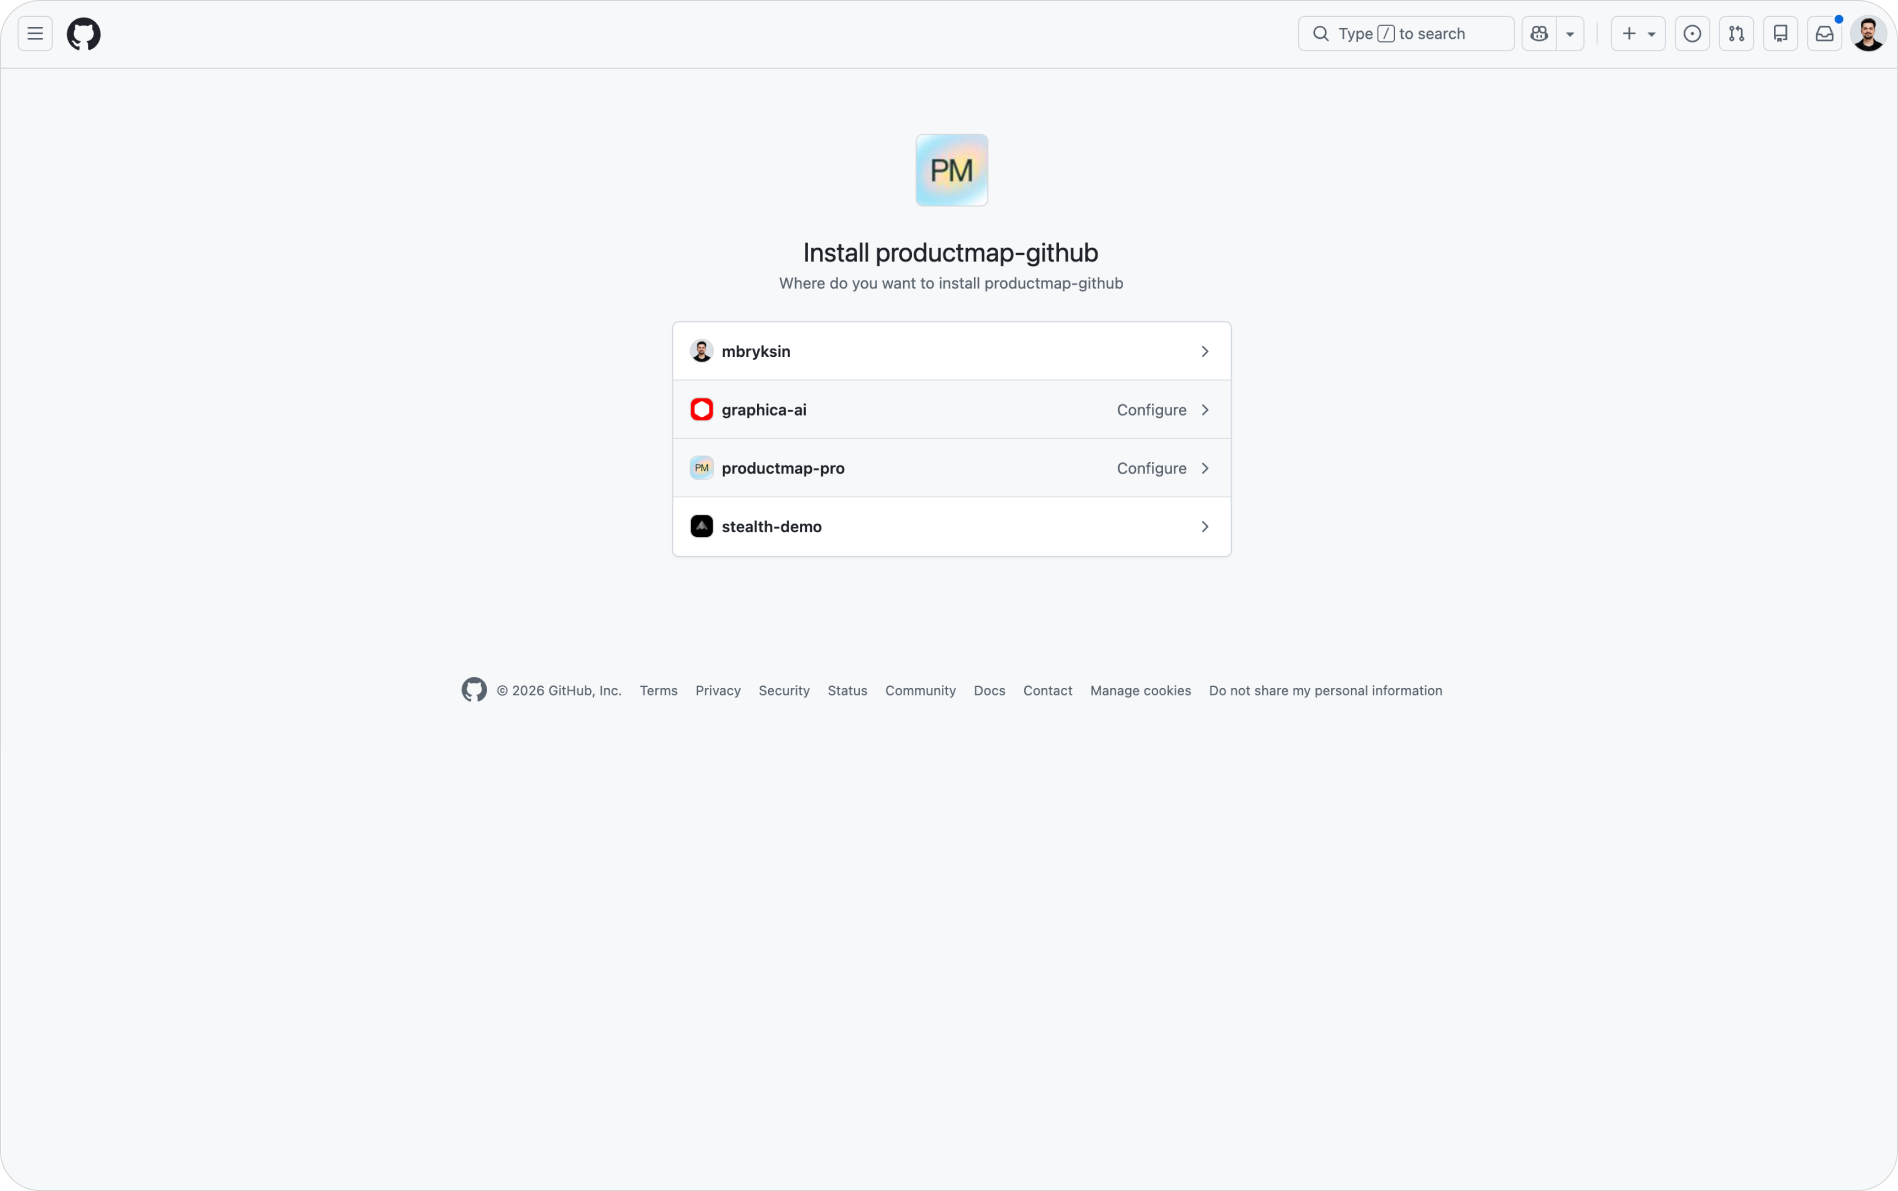
Set the authorization scope
This is the screen worth reading instead of clicking through. GitHub asks for a repository scope, All repositories or Only select repositories, and lists exactly what the app can do below it: read access to metadata, and read and write access to administration, code, and pull requests.
All repositories is convenient, and it's also the setting most tutorials wave past. On a personal account it's low risk. Inside a real company org, it hands one integration standing write access to every repo the org owns or ever will own, most of which have nothing to do with the product you're setting up. Choose Only select repositories and add repos to that list on purpose, the same scrutiny you'd apply to any third-party app requesting org-wide write access.

Select your repository
Authorizing on GitHub's side redirects you back into Product Map, where the same connection modal now lists the actual repositories the app can see, pulled live from the scope you granted a moment ago.
Pick the repository that already holds, or should hold, this product's context. Product Map works against a repo you already have; it doesn't require an empty one to bootstrap from. Select it and click Connect repository. A success toast confirms the link before you return to the project home.

Confirm the connection
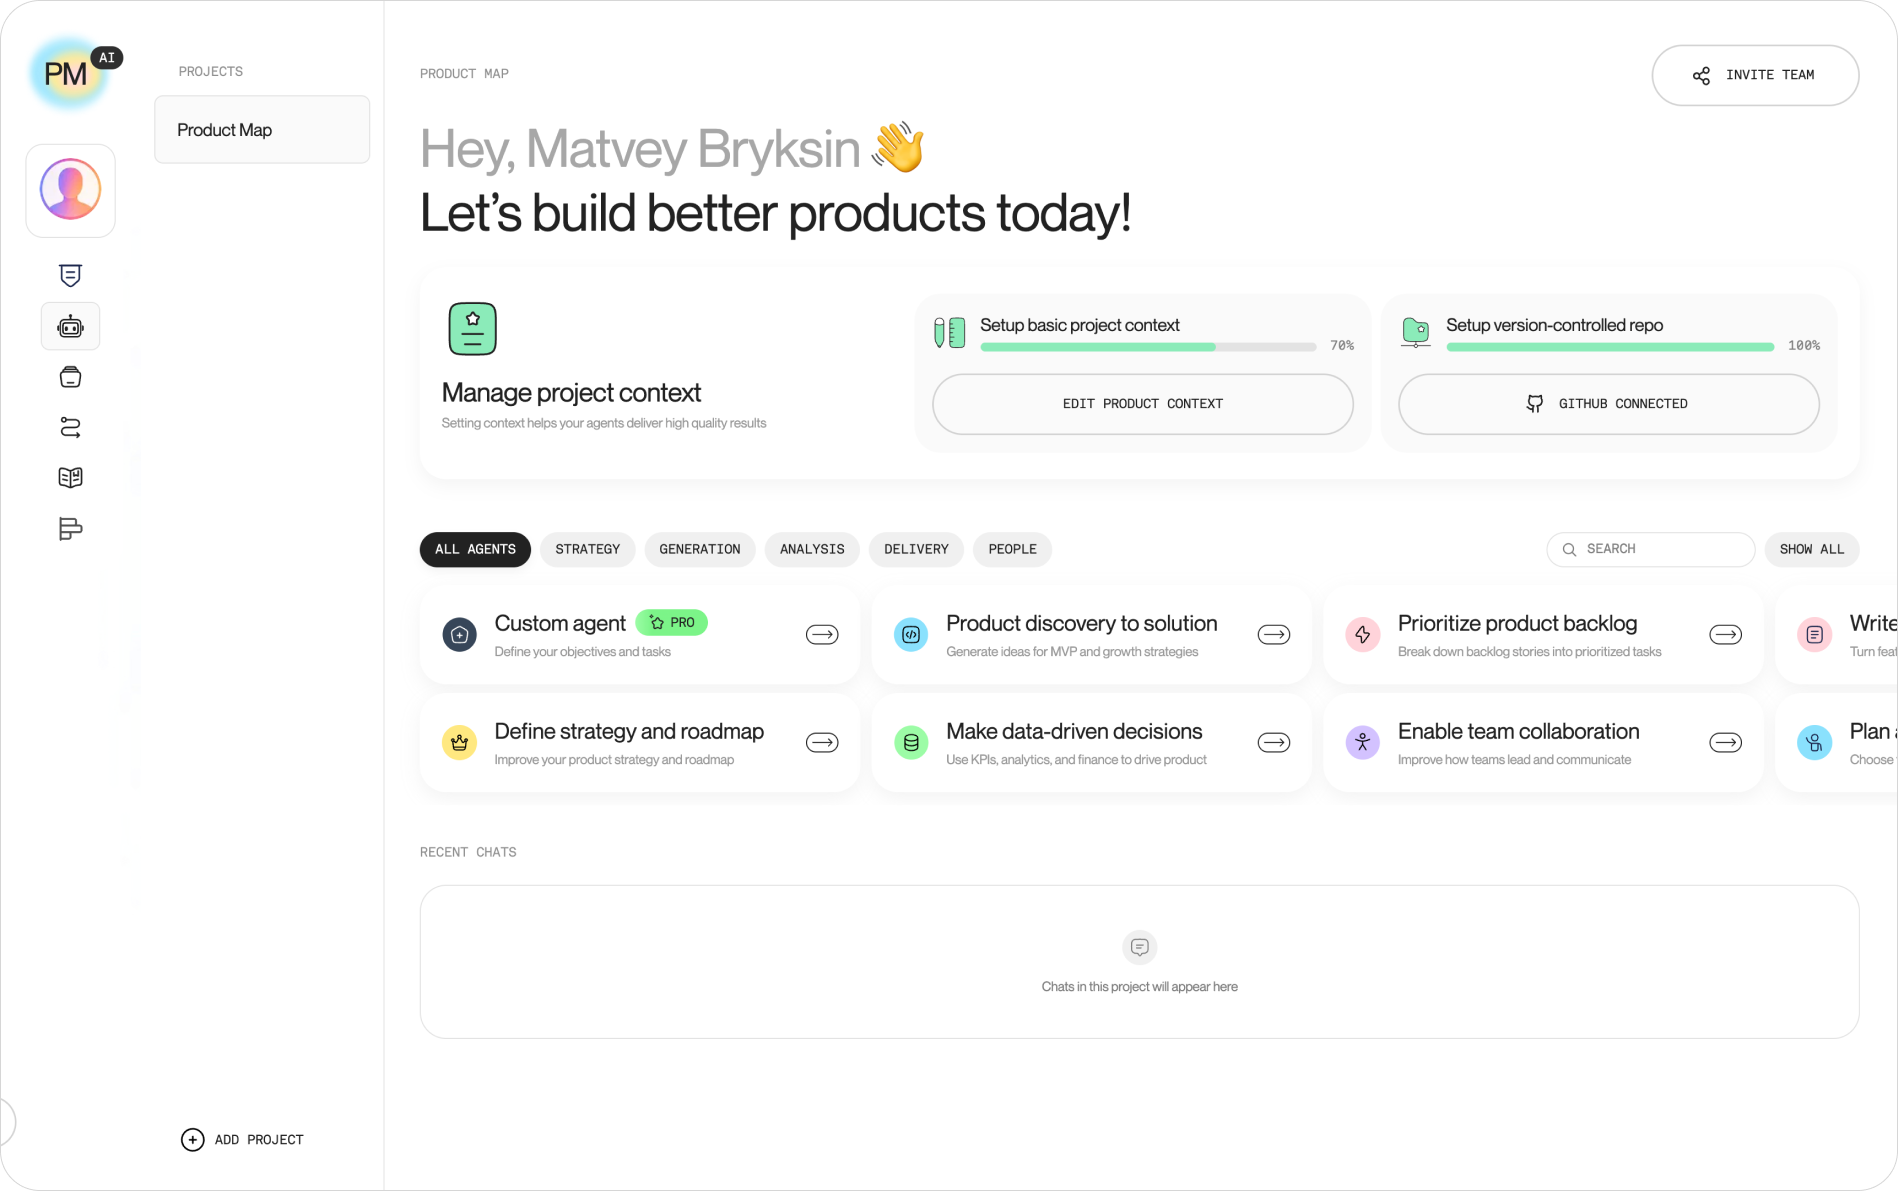
Back on the project home screen, the version-controlled repo progress bar now reads 100%, and the button that used to say Connect with Git now reads GitHub Connected. That's the full signal the link succeeded; there's no separate confirmation screen to click through.
4. Build the repo with agents
With the repository connected, Product Map builds the folder structure on its own, and your agents take it from there, reading and writing context as diffs you review before anything lands. This phase covers the repo taking shape, the first agent run, and how to close the connection down when a project ends.
The folder structure appears
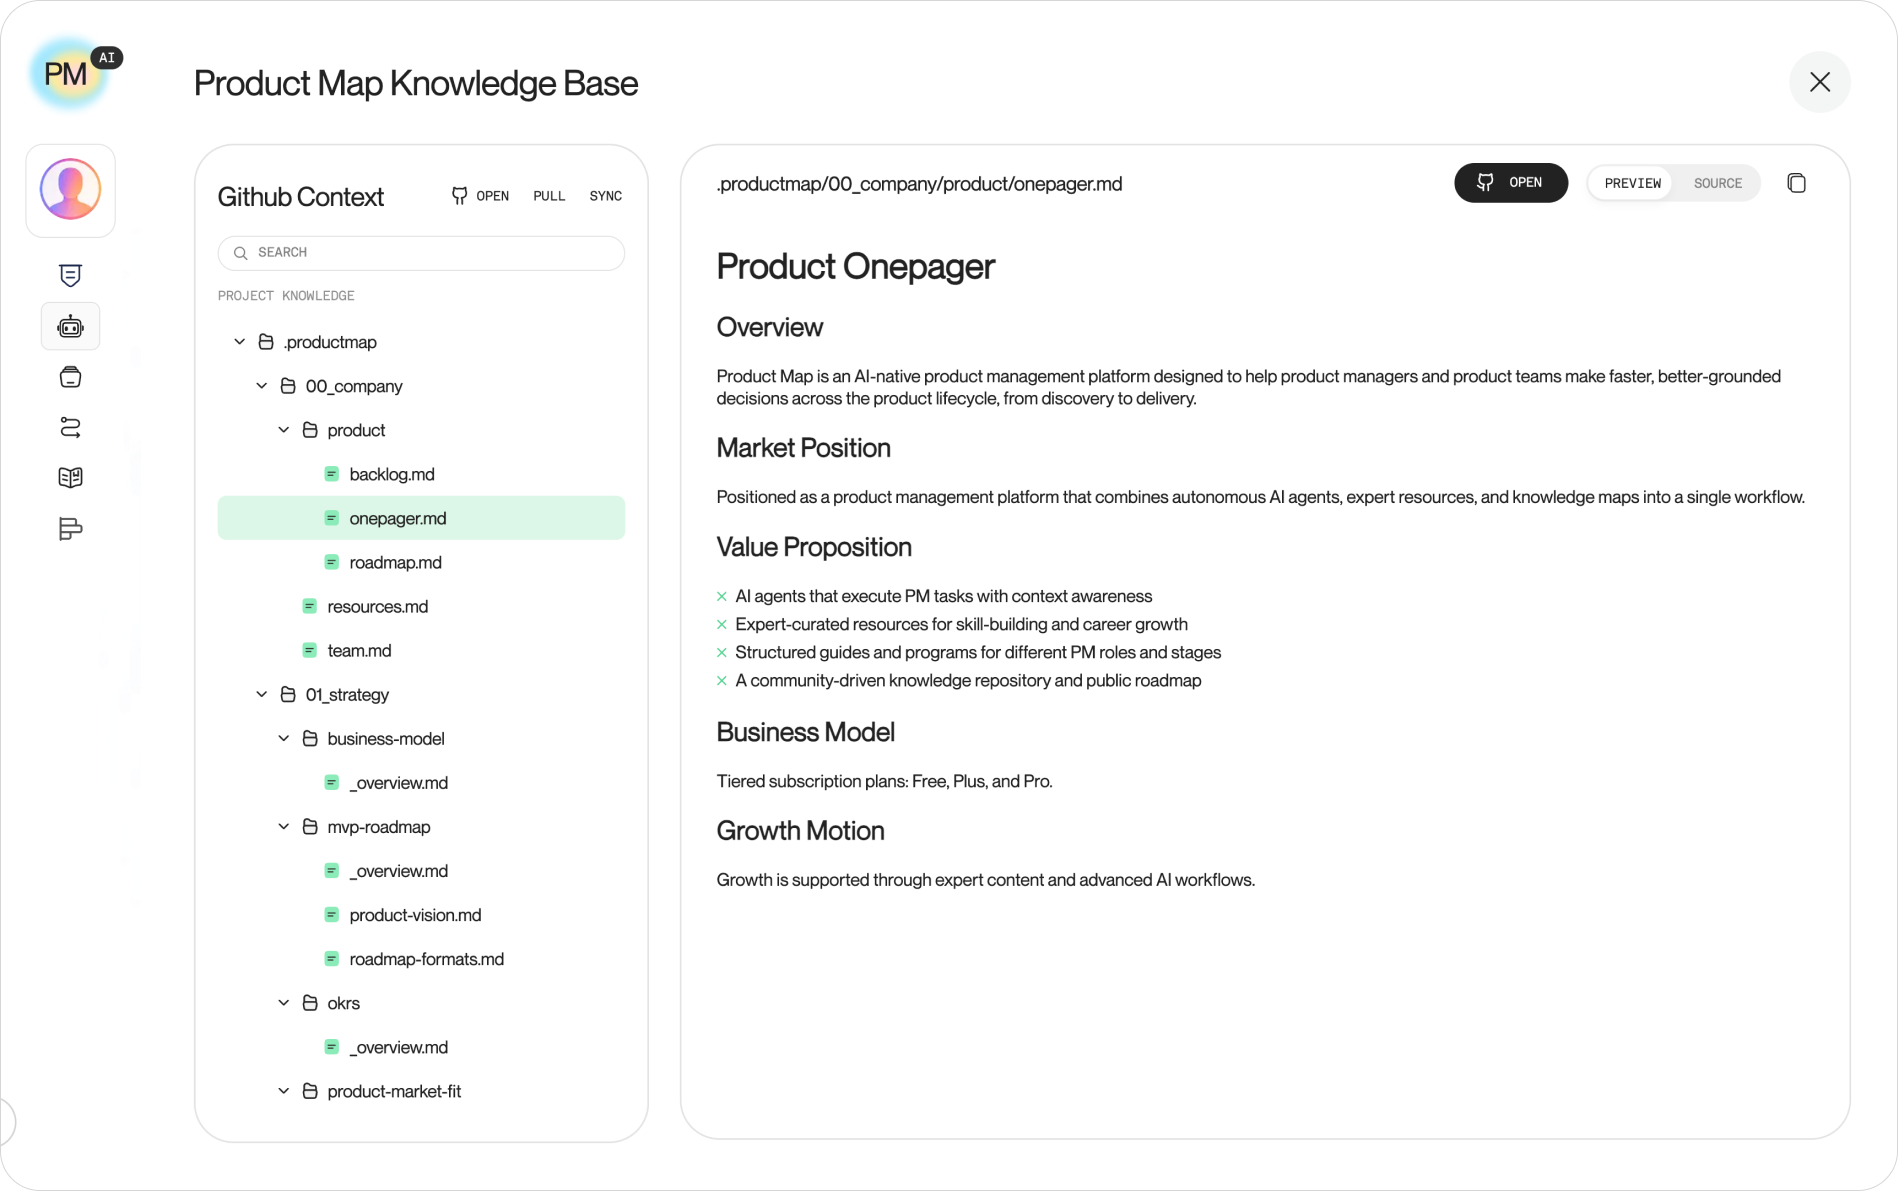
The moment the repository connects, Product Map's bot writes a folder structure straight into it. Open the knowledge base panel and you'll find a .productmap folder holding numbered domain folders, 00_company, 01_strategy, and more, each already populated with starter Markdown files like onepager.md and roadmap.md.
You didn't create a single one of these folders by hand. The taxonomy mirrors the same domain structure covered in the Git knowledge repository guide, mapped to the TASK framework, and it's what gives every agent a consistent place to read from and write to going forward.
Show All Agents
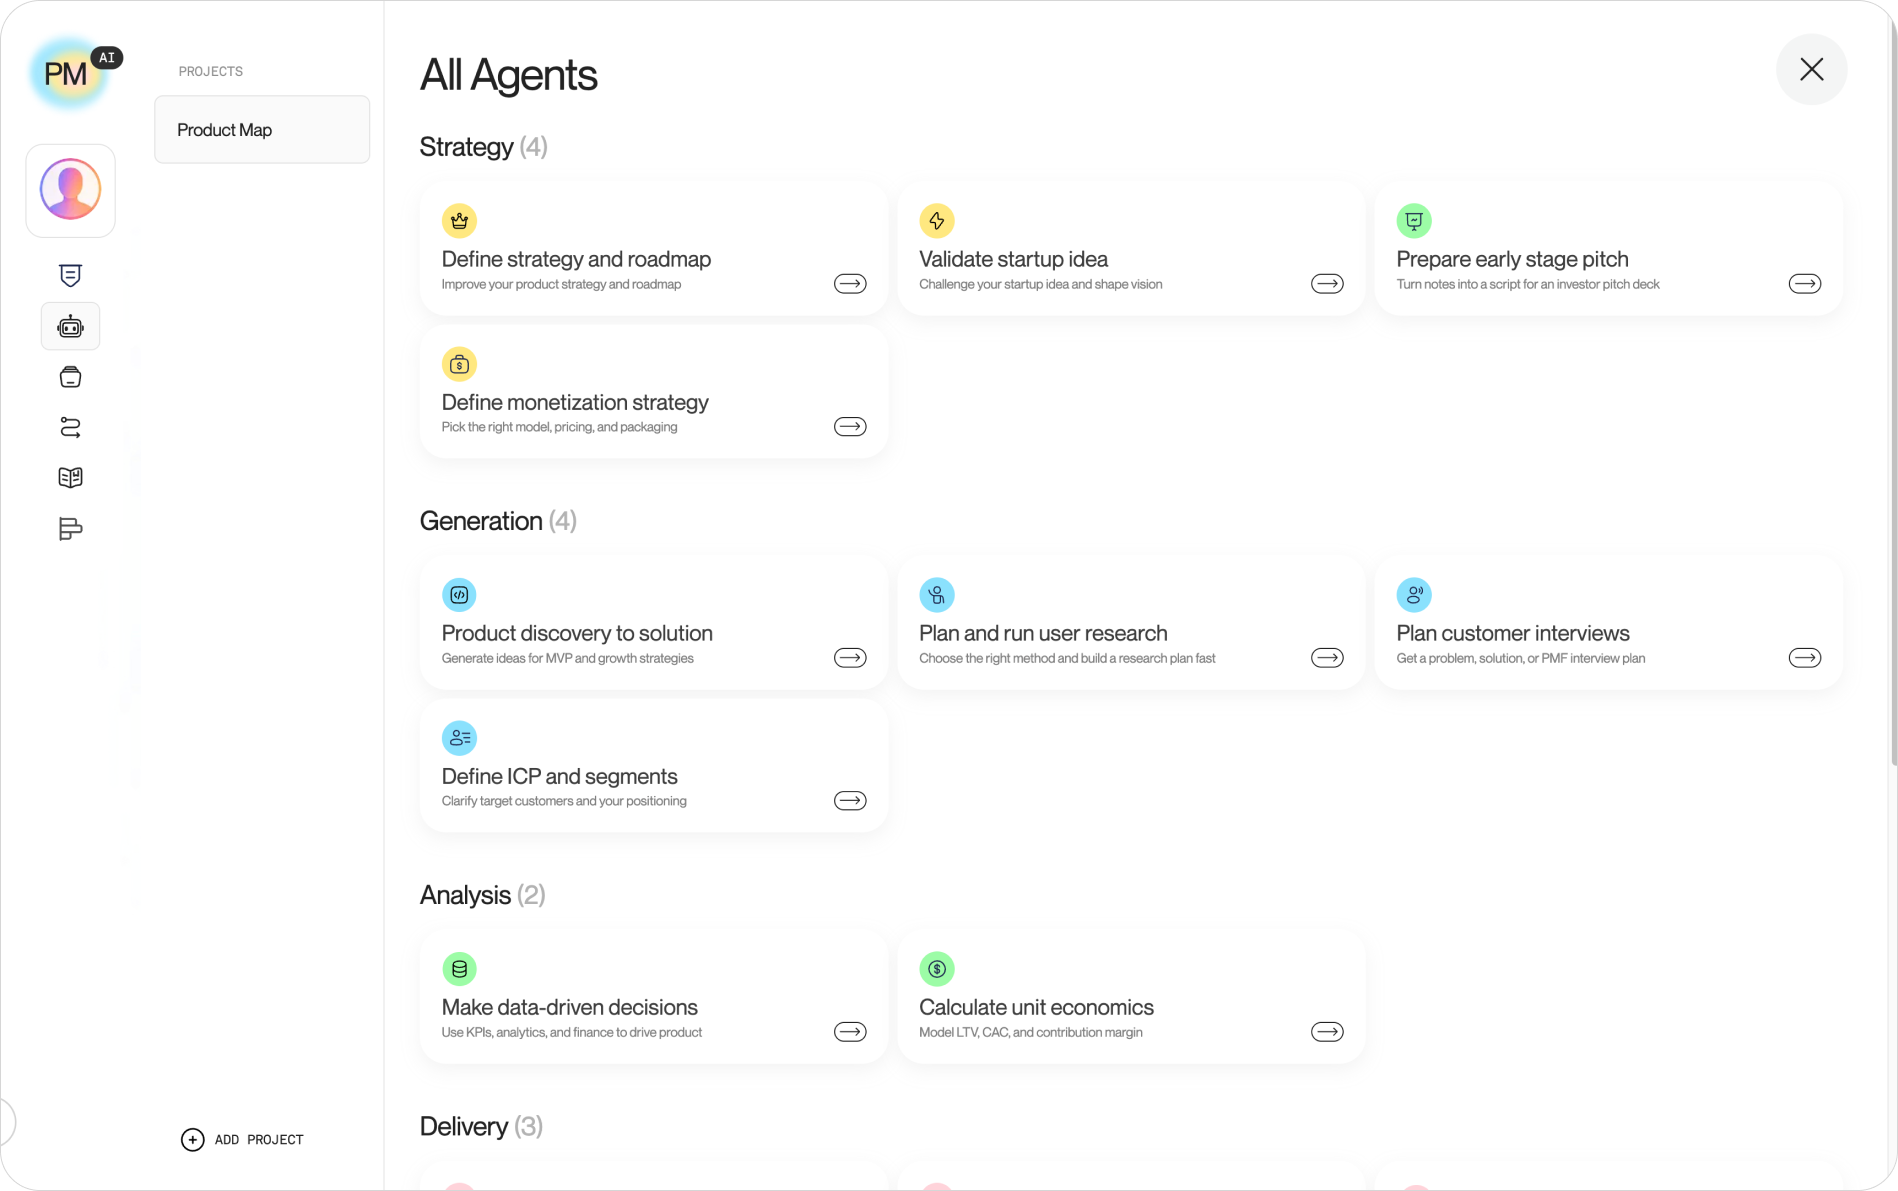
With the repository connected and the structure in place, the project home screen's agent list becomes the working surface. Click through to Show All to see the full catalog grouped by category: Strategy, Generation, Analysis, Delivery, and People.
Each card names a specific task instead of a vague capability, define strategy and roadmap, plan customer interviews, calculate unit economics, so picking one reads closer to assigning a ticket than prompting a chatbot.
Run the strategy AI agent
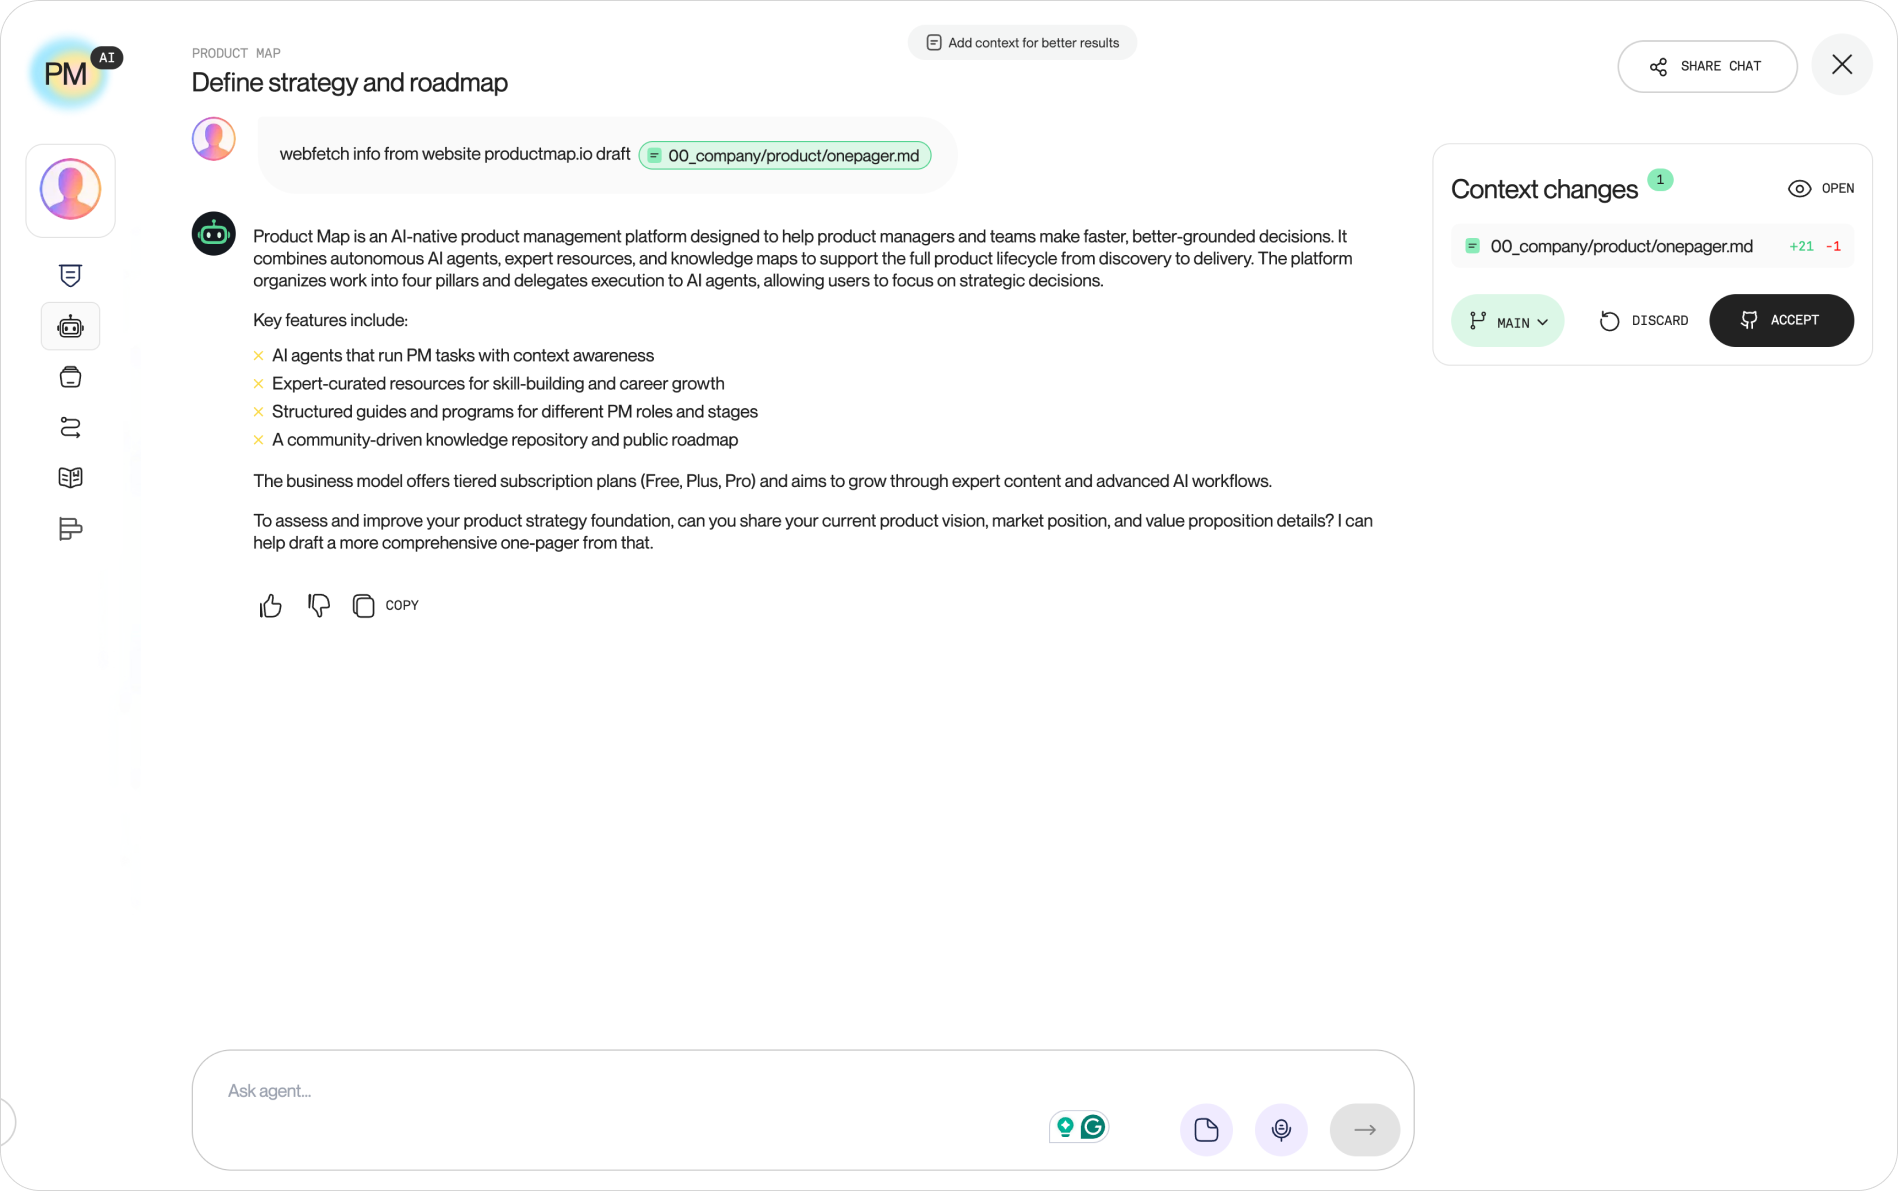
Open Define strategy and roadmap and you land in a chat tied to your connected repository. In the run shown here, the agent runs a webfetch against the product's website and proposes a rewrite of 00_company/product/onepager.md, the same file your project context seeded back at setup.
The right-hand panel shows the change as a diff, plus 21 lines, minus 1, under a Context changes tracker, with Discard and Accept sitting next to a branch selector. Nothing writes to your repository until you click Accept. That's the same review gate covered in the team workspace guide: on a solo project, accepting commits straight to main; on a team repository, the same change opens a pull request instead.
Disconnect the GitHub app
Not every connection is permanent. A demo repo, a contractor engagement, or a client project wrapping up all call for the same cleanup, and it happens on GitHub's side, not inside Product Map.
Go to the organization's settings, open Installed GitHub Apps, and find productmap-github. From its settings page, Suspend pauses access without losing the configuration, and Uninstall removes the app and revokes access to everything it could reach. If you granted All repositories access back at authorization, uninstalling is the only way to fully close that door.
Do this once, then keep it up
Thirteen screens, one time, per product. What compounds afterward is smaller: commit after every agent session, keep the project's context current when priorities shift, and let pull requests carry the review load once more than one person writes to the repo. Six months of that habit turns the folder structure you connected today into the record of how the product actually got built.