




Microsoft teams version the code and leave the product context outside it. Code lives in Azure Repos with branches, reviews, and history. The PRD it came from lives in SharePoint, where the "last edited" stamp is the whole audit trail. An AI agent reading either starts from zero every time.
Product Map now connects both. Azure Repos holds the context repository the agents read and write. Microsoft 365 and Microsoft Teams feed it on one sign-in.
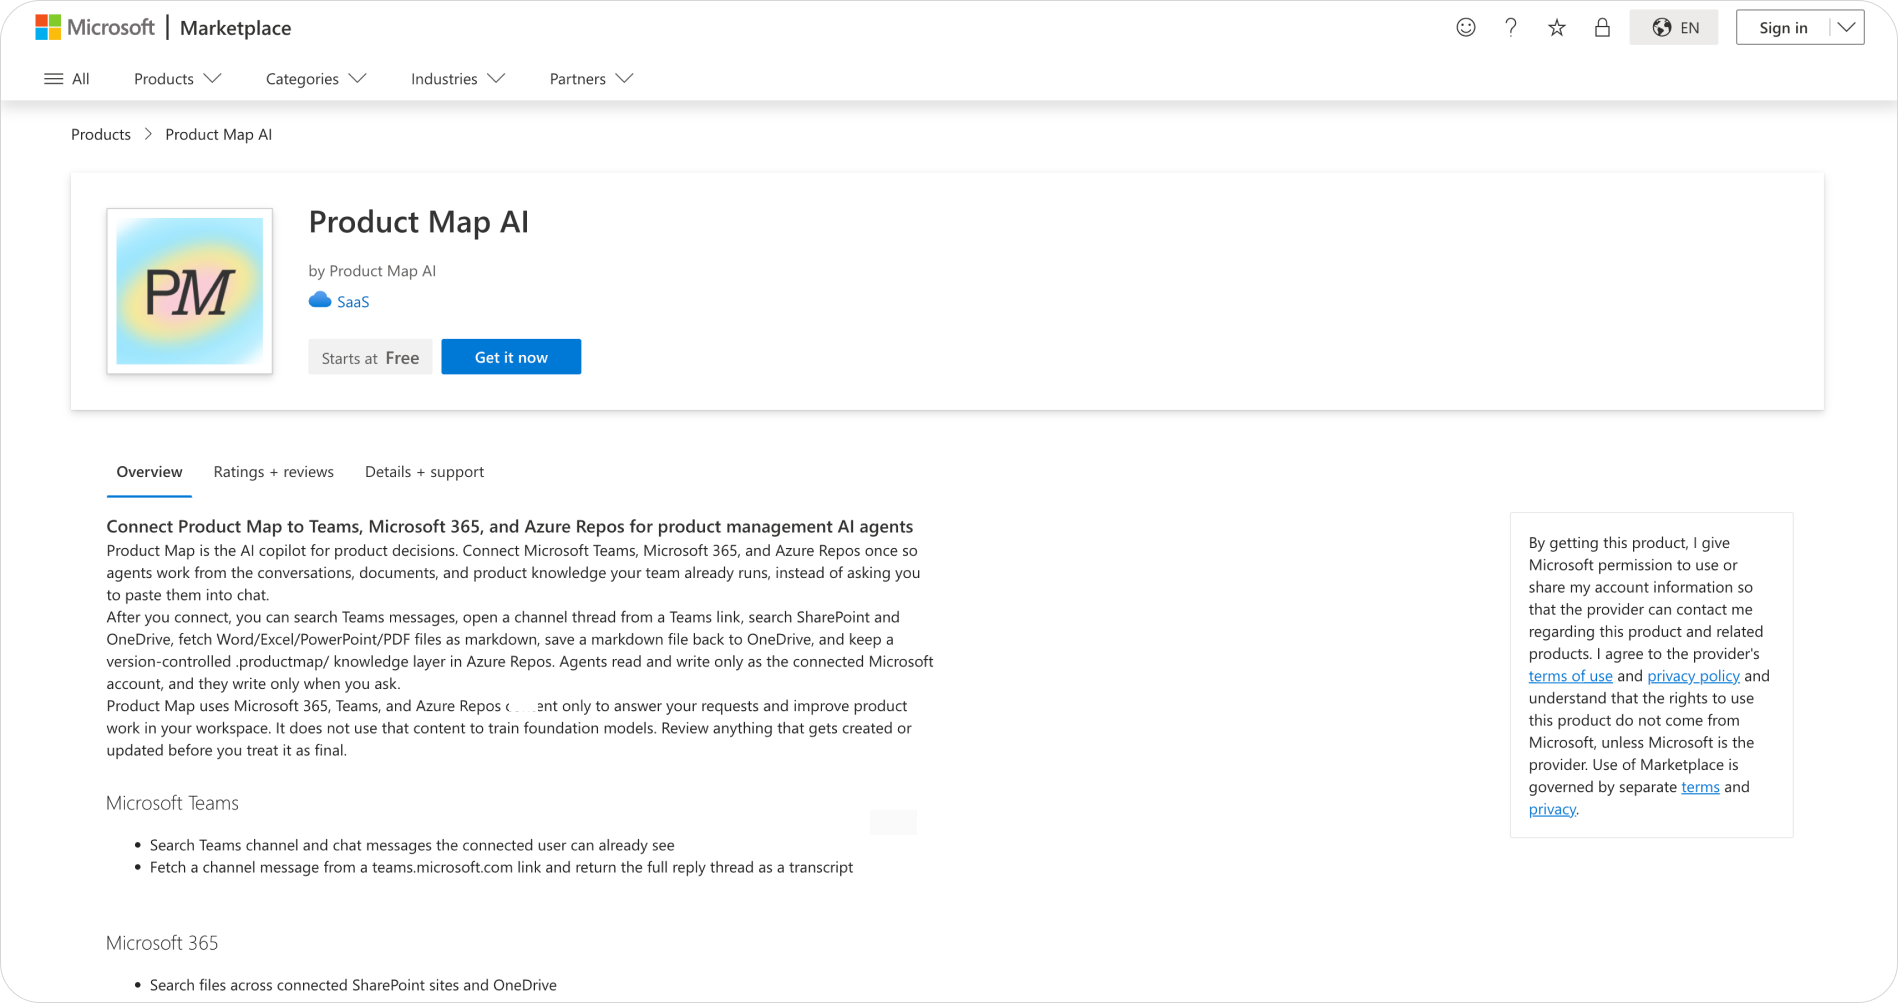
Product Map is an official Microsoft partner. Product Map AI is listed on the Microsoft Marketplace as a connector for Azure Repos, Microsoft 365, and Teams. The Azure Repos app is also listed on the Visual Studio Marketplace. The Microsoft 365 and Teams connectors run on Microsoft Graph through the same Entra app registration.
This walkthrough follows every screen in that setup across four phases: create the project and link Azure Repos, connect Microsoft 365, draft a PRD from a SharePoint document, then push the spec back to the repository and save a copy to OneDrive.
Keep product context in Git
A Word document in SharePoint is a fine place to write a PRD. It is a poor place for an agent to read one, for three reasons.
- Every read is a fetch. An agent reading SharePoint needs a Graph token, a delegated scope, a drive item ID, and a file conversion on every run. An agent reading a repo opens a file.
- Nothing is reviewed. Autosave in Word is live the moment the cursor stops. A repo change lands as a pull request with a reviewer's name on it, or not at all.
- History is locked in the UI. Azure Repos gives you
git logandgit blamefor every line of product context. SharePoint version history exists, and no agent reads it.
Product Map's answer is one .productmap folder in your Azure Repos repository, holding one-pagers, strategy, PRDs, and research as plain Markdown, structured by the TASK framework. Every agent reads from that folder before it drafts anything. Every change it proposes lands as a commit or a pull request you review first, the shared workspace discipline engineering already runs on.
SharePoint doesn't go away. It becomes an input. The spec starts as a Word file and gets pulled into the repo as context. The repository sits in the middle as the copy every agent trusts.
Why agents run faster on a Git-backed context layer
The cost shows up on every run, not once. Before an agent drafts a spec or scores a backlog, it loads context: what the product is, who it serves, what's in flight. Where that context lives sets the bill.
The Markdown benchmark puts numbers on it. The same product overview costs 649 tokens as Markdown and 12,715 as JSON, the shape APIs hand back. Delivery path matters as much as format: pulling one Notion page live through its MCP server took around 18 seconds and roughly 6,200 model tokens in tool calls and block conversion. Once the same page sat in the repo as Markdown, the read needed no auth handshake and no tool calls. The agent opened the file and paid for the text alone.
Fetch the Word file once, accept it into the repository as Markdown, and every later agent run reads it at file prices instead of Graph API prices.
That is the whole argument for the loop in section 3. The connector does the expensive fetch one time, under your review. The repository serves the cheap read forever after, to Product Map agents and to Claude Code, Cursor, or GitHub Copilot alike, because all of them speak Git natively and none speaks SharePoint without setup.
1. Create a project and link it with Azure Repos
A project is the container Product Map binds to one Azure Repos repository. This phase covers onboarding, seeding context, and the seven screens that take you from a new project to Azure Repos Connected.
Complete onboarding and add a project
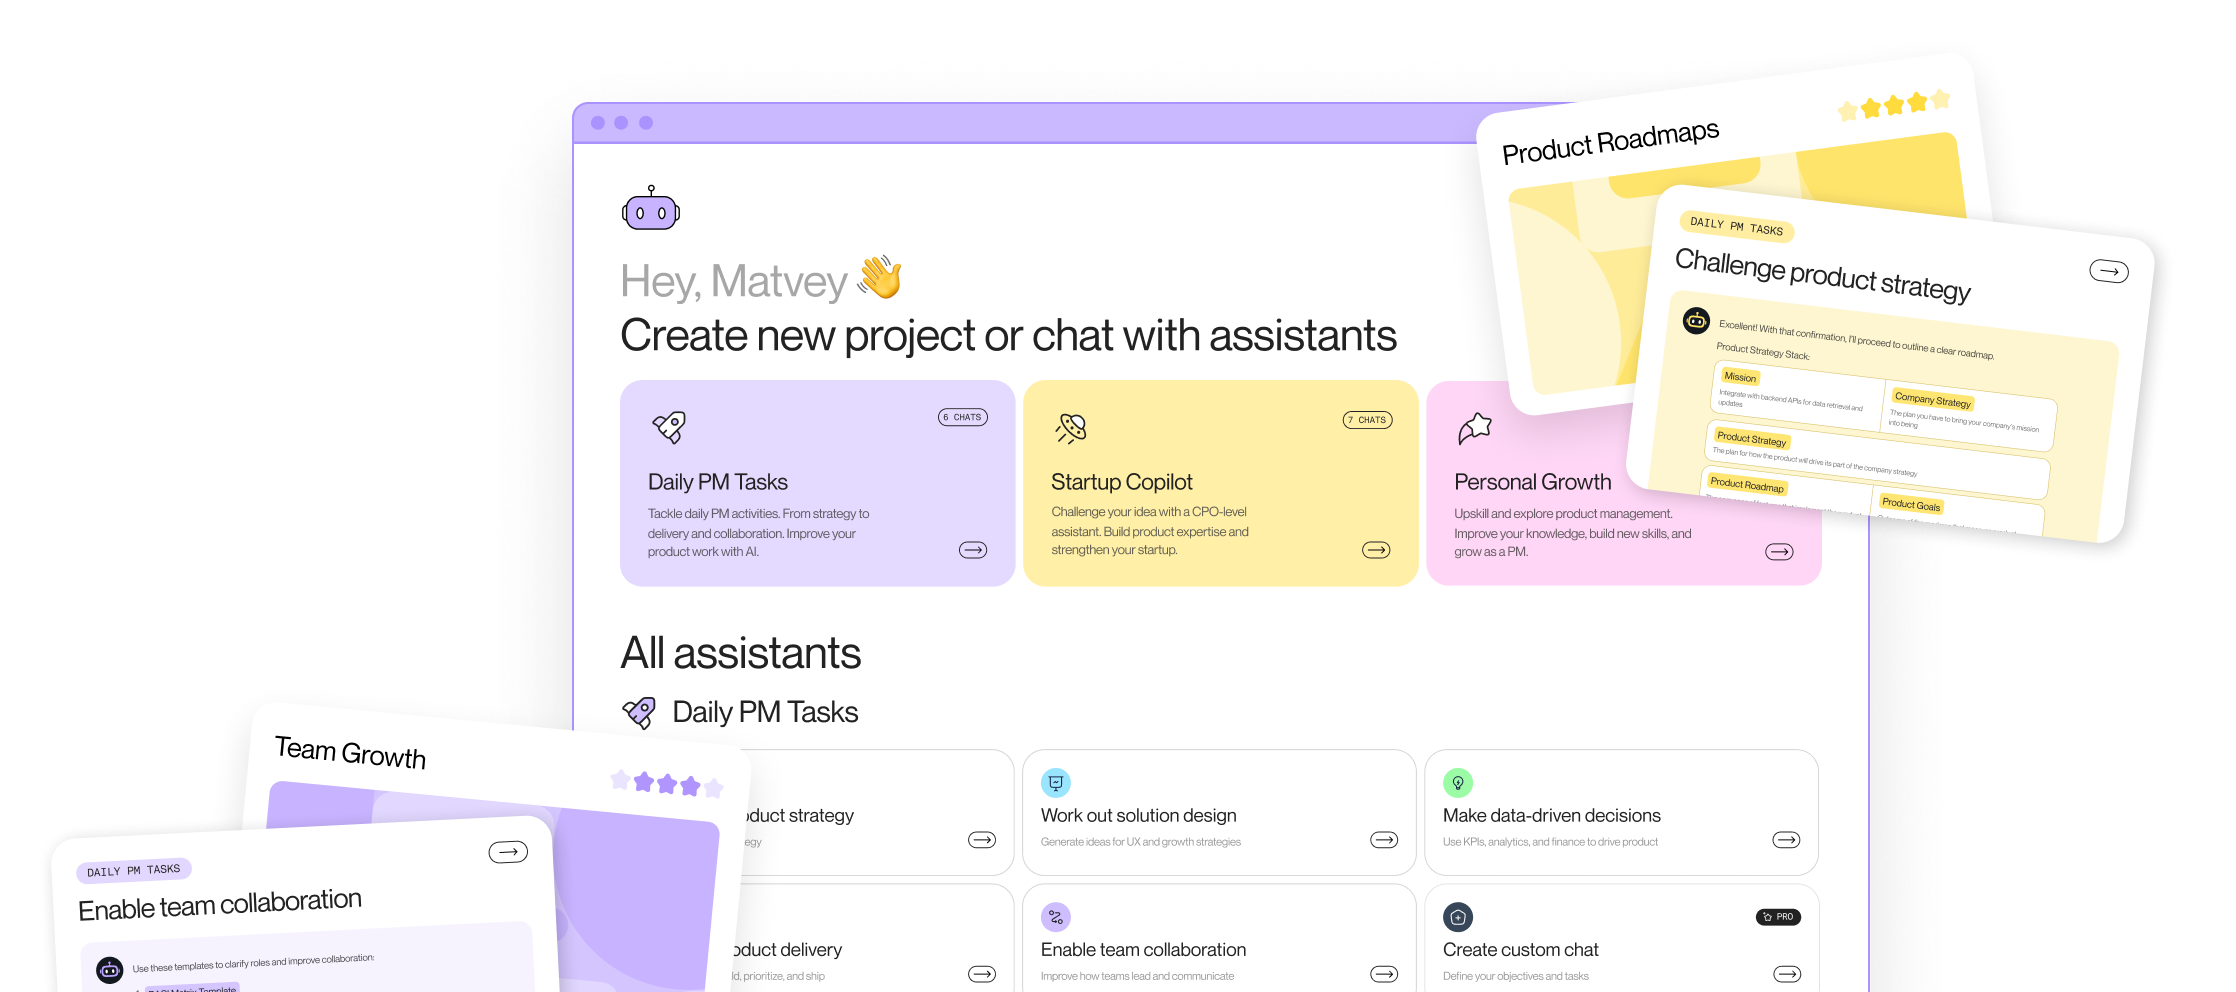
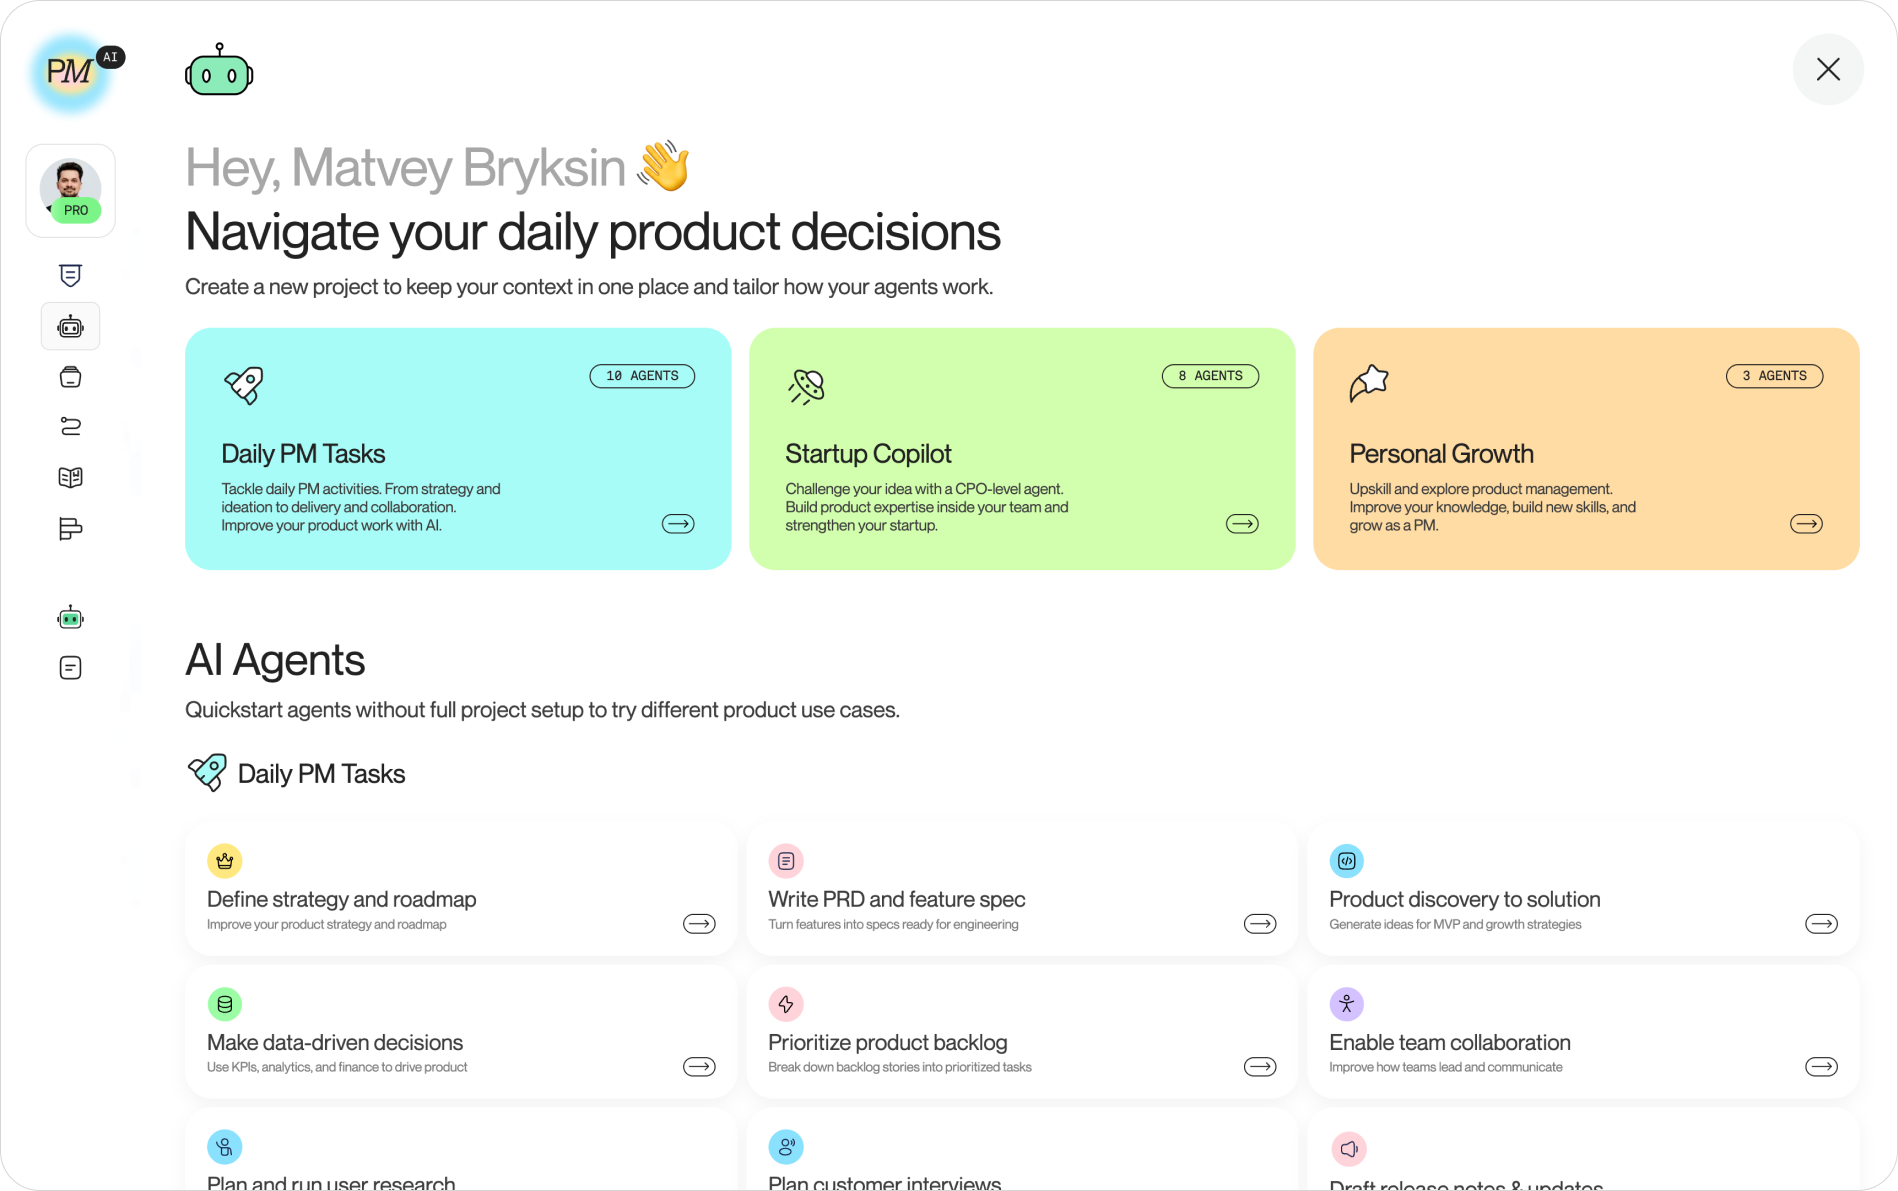
Every new Product Map account lands on the quick-start screen. It lays out three workspace types: Daily PM Tasks, Startup Copilot, and Personal Growth, each bundling a different set of agents. Below them sits a flat list of every agent available without a full project setup.
Sign in with the Microsoft button if your company runs on Entra ID; the later consent screens then skip the account picker. Pick the workspace that matches what you're building context for, then click Add project in the left sidebar. Name it after the product itself. One product gets one project, not one project per team or initiative.
Seed project context
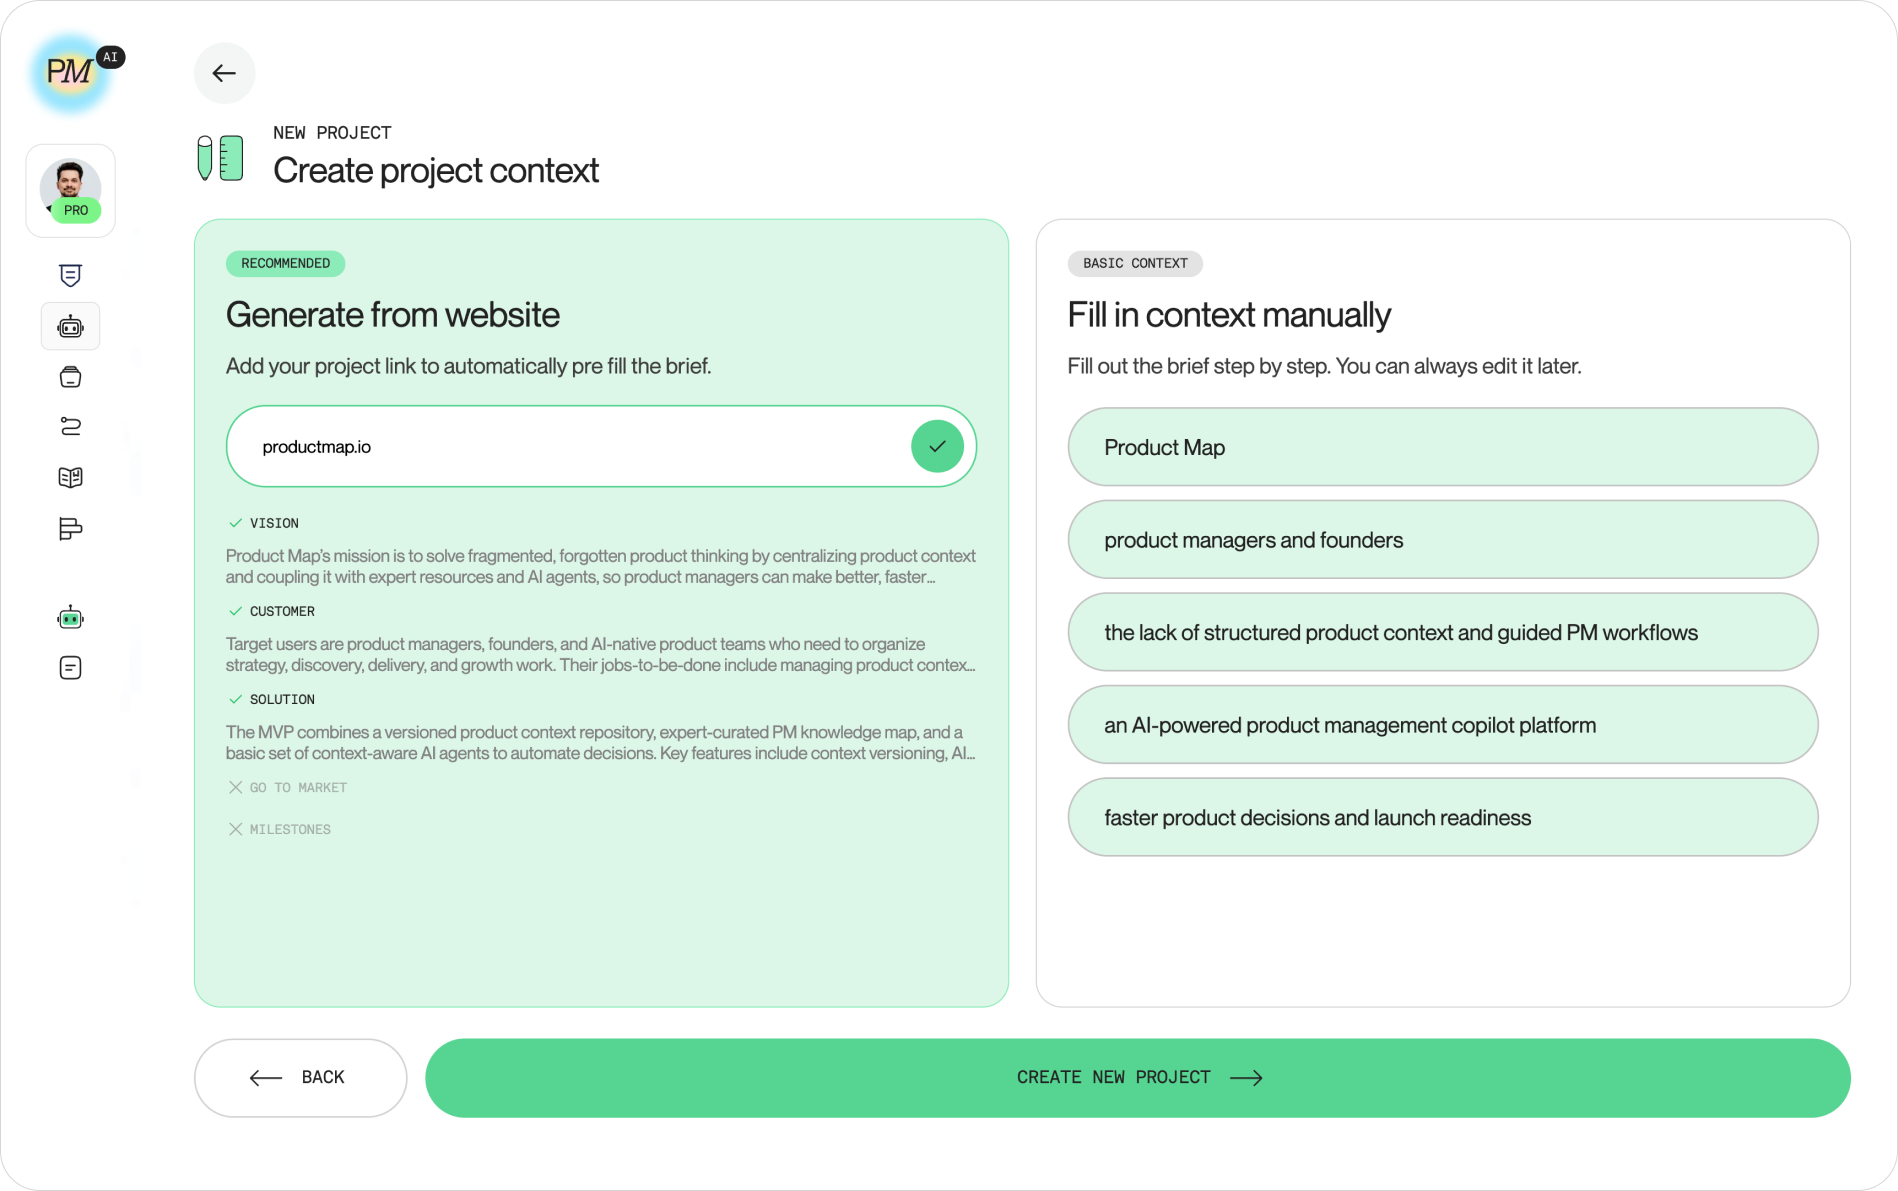
Creating a project opens a two-column choice: generate context from a website, or fill it in by hand. The website option calls out to your product's site and pulls a summary the way a person skimming the homepage would, positioning, audience, the problem it solves, then drops that into the brief for you to review.
Type your domain into the Generate from website field and confirm. Product Map fills the brief on the left with green checkmarks for what it found and greys out anything it couldn't infer. On the right, the same information appears as short editable fields: organization, target customers, product goal, pain point, and positive outcome. Read through both sides before you click Create new project.
Open the Azure Repos connection
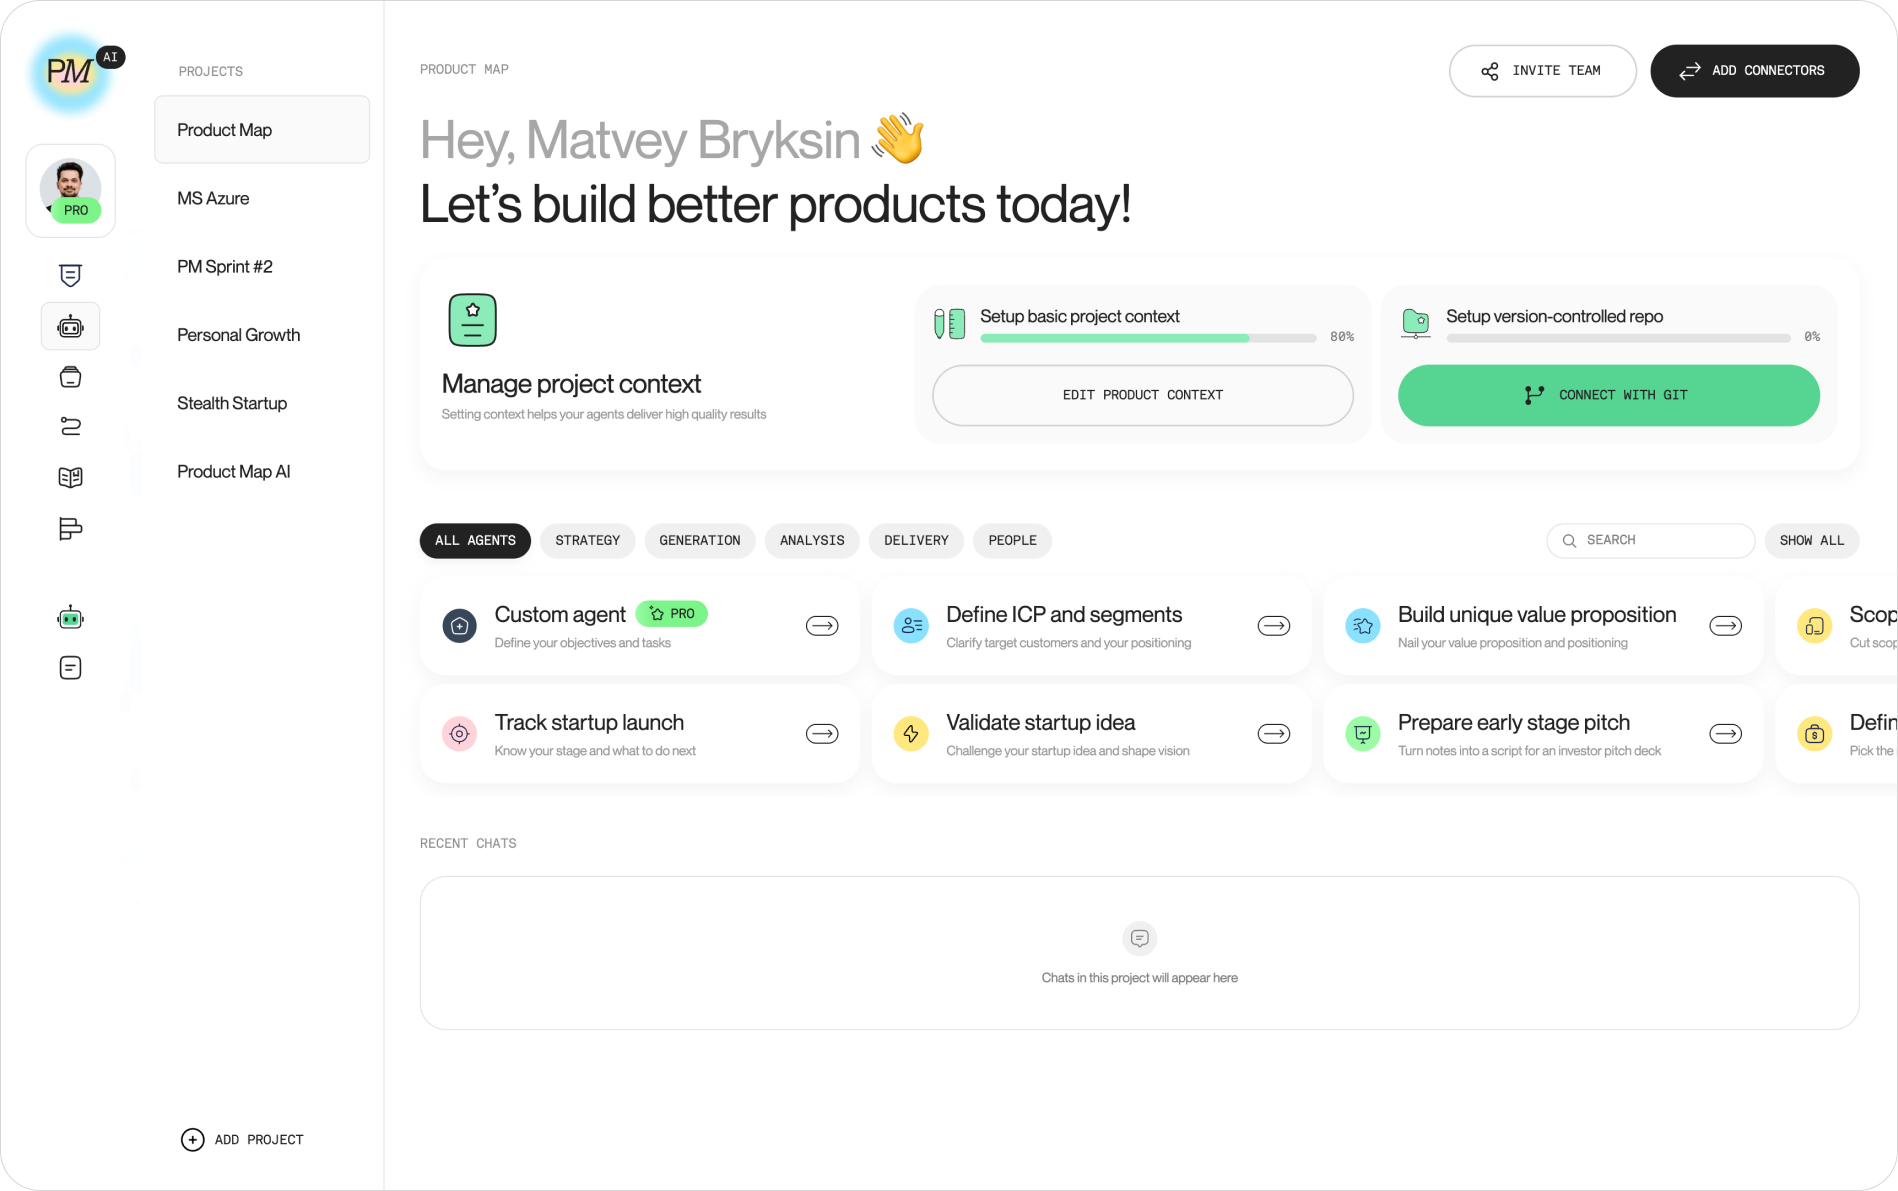
Your new project lands on a home screen with two progress trackers: Setup basic project context, already partway done from the step above, and Setup version-controlled repo, sitting at 0%. The second one is where the Azure Repos connection starts.
Click Connect with Git. The basic context bar doesn't need to hit 100% first; the two setups run independently of each other.
Create an Azure Repos repository
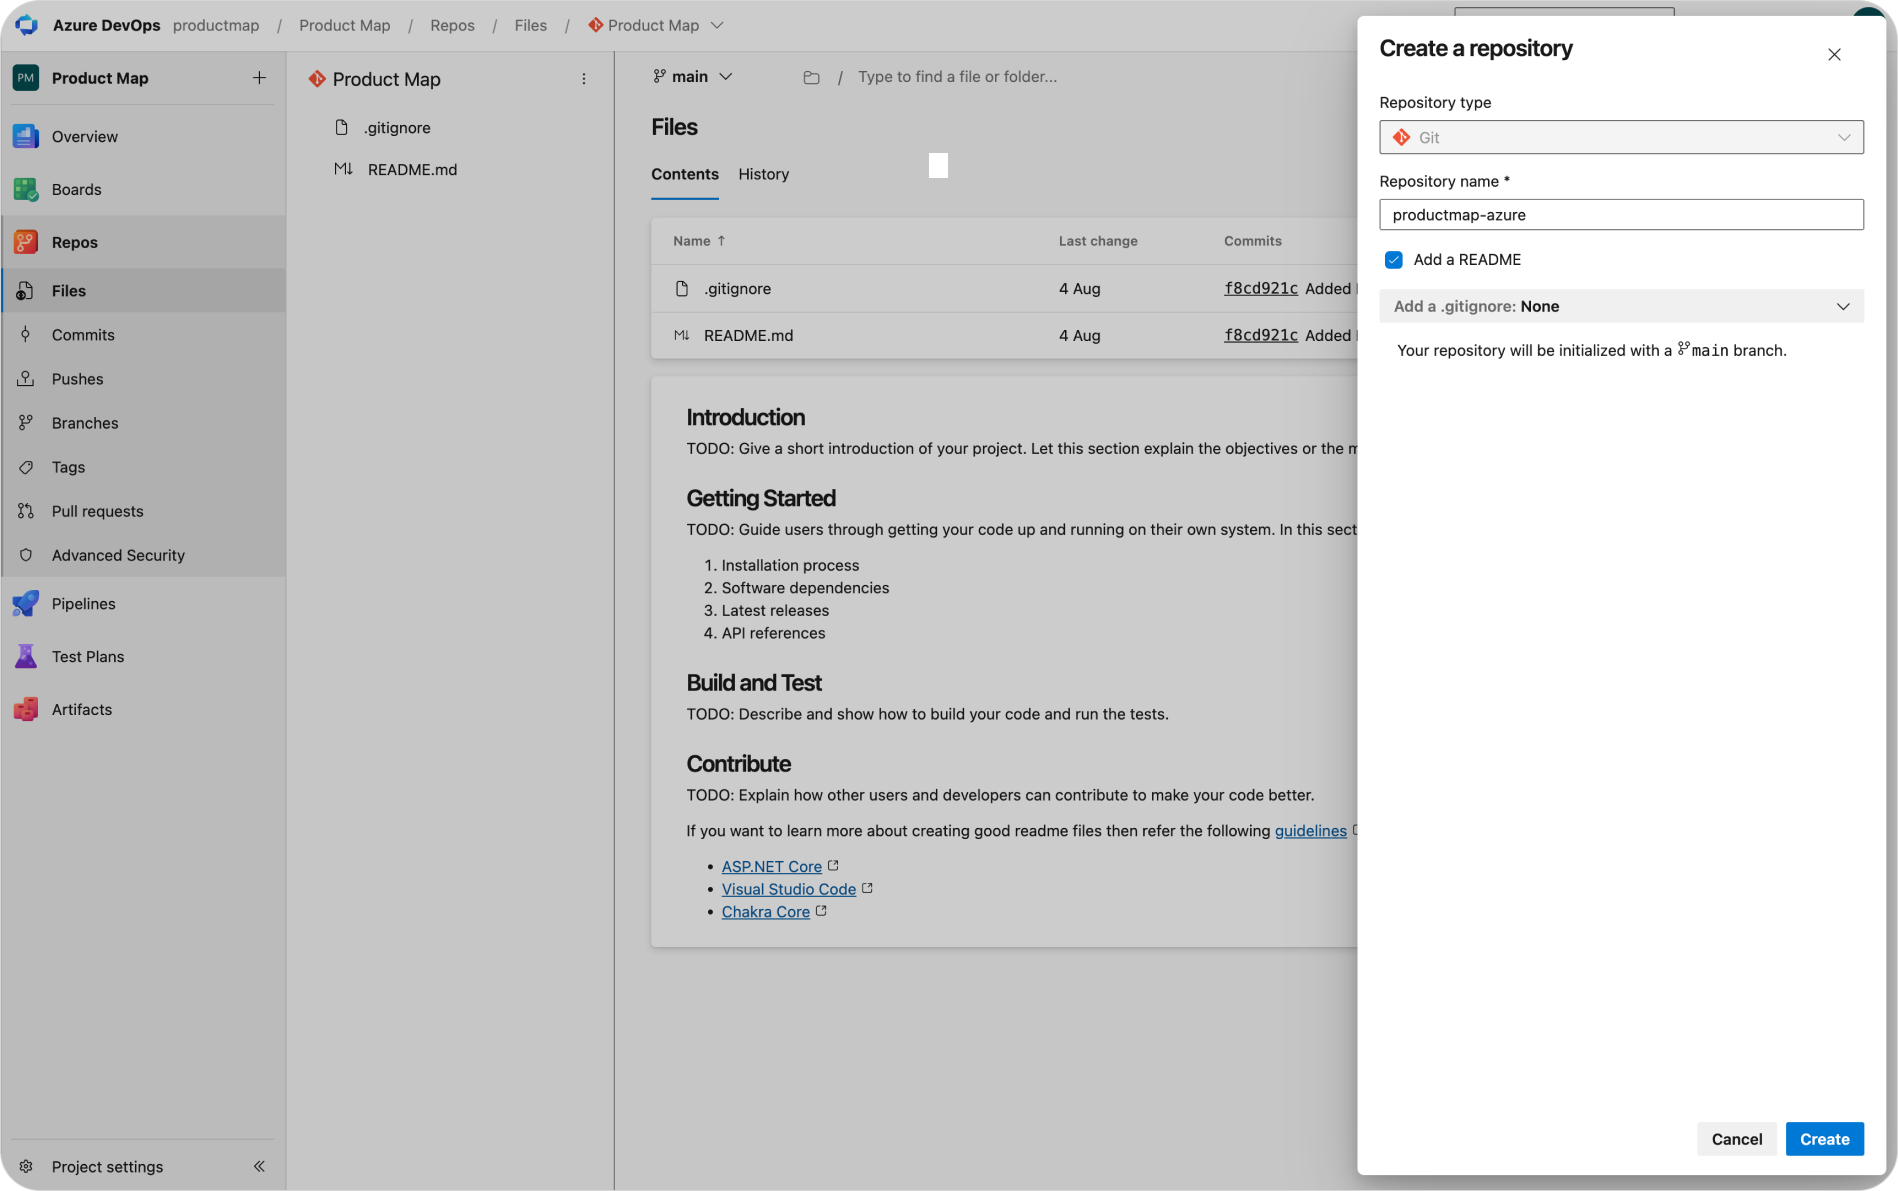
Product Map works against a repository you already have; it doesn't create one for you. If you don't have one yet, open your Azure DevOps organization at dev.azure.com and create it before you connect.
Inside a project, open Repos, drop down the repository picker, and choose New repository. Name it after the product, keep Git as the type, and leave Add a README checked. That checkbox matters. A fresh Azure DevOps project ships with an uninitialized repository: no commits, no branches, no main. Product Map writes the .productmap folder onto the tip of your default branch, and an empty repository has no tip, so the first publish fails. One README commit is enough. If the project's default repository still shows the Initialize banner, click it and add the README there.
Select Azure Repos as your provider
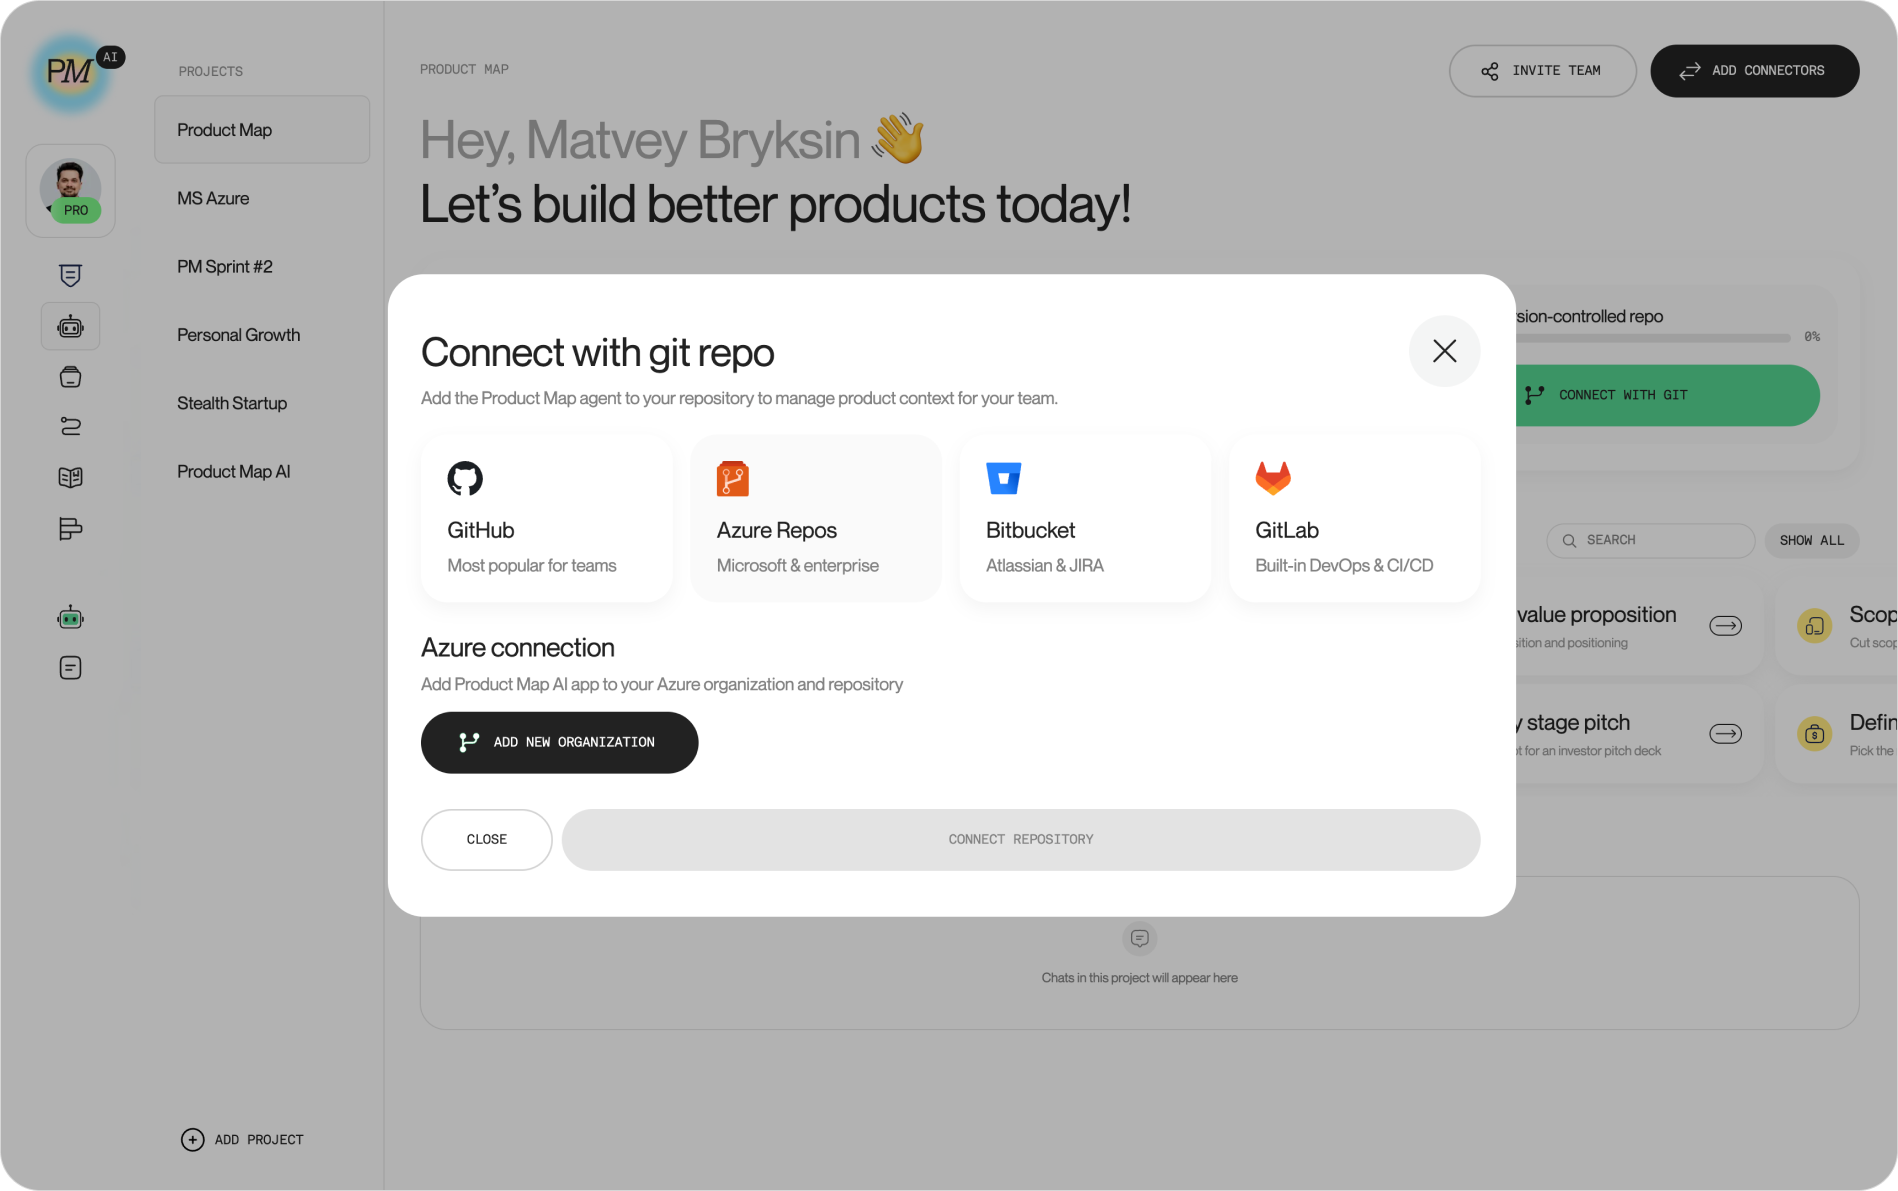
Back in Product Map, the Connect with git repo modal opens with four provider cards: GitHub, Azure Repos, Bitbucket, and GitLab. The Azure Repos card carries the tagline "Microsoft & enterprise."
Select it. The section below the cards changes to Azure connection, explaining that the Product Map AI app gets added to your Azure organization and one repository inside it. The only button at this point is Add new organization.
Authorize with your Microsoft account
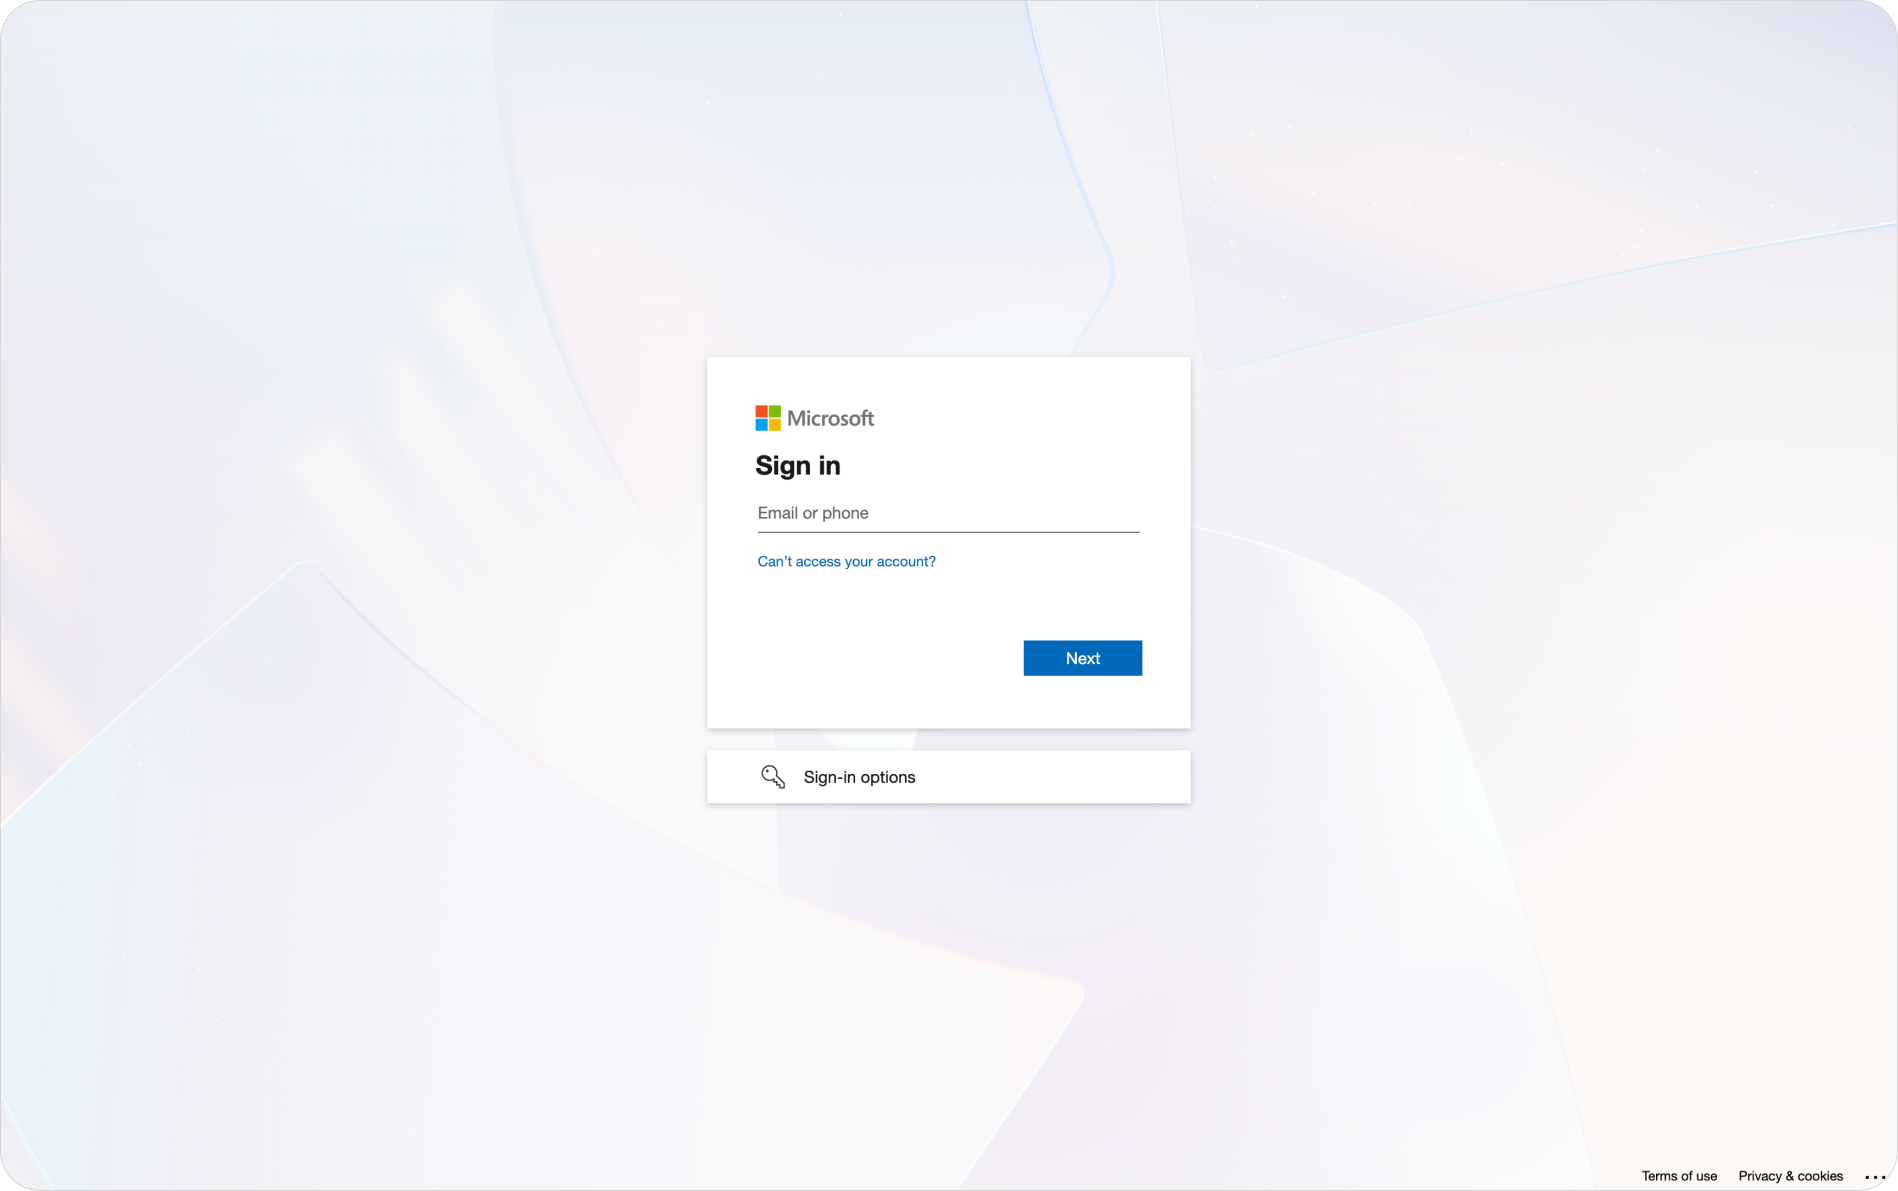
Clicking Add new organization leaves Product Map and opens the Microsoft sign-in page at login.microsoftonline.com in the same tab. Pick the work or school account you use for Azure DevOps. The consent screen names Product Map AI and asks for two permissions: access to Azure DevOps on your behalf, and the right to keep that access after you close the tab, which is how the connection outlives the one-hour token.
Use the right account. Azure Repos lists organizations by membership, so a Microsoft account that has never joined an Azure DevOps organization comes back with an empty list, and the modal keeps showing Add new organization with nothing under it.
Accept and Microsoft redirects you back to the same modal. No personal access token to generate, nothing to paste.
Connect your repository
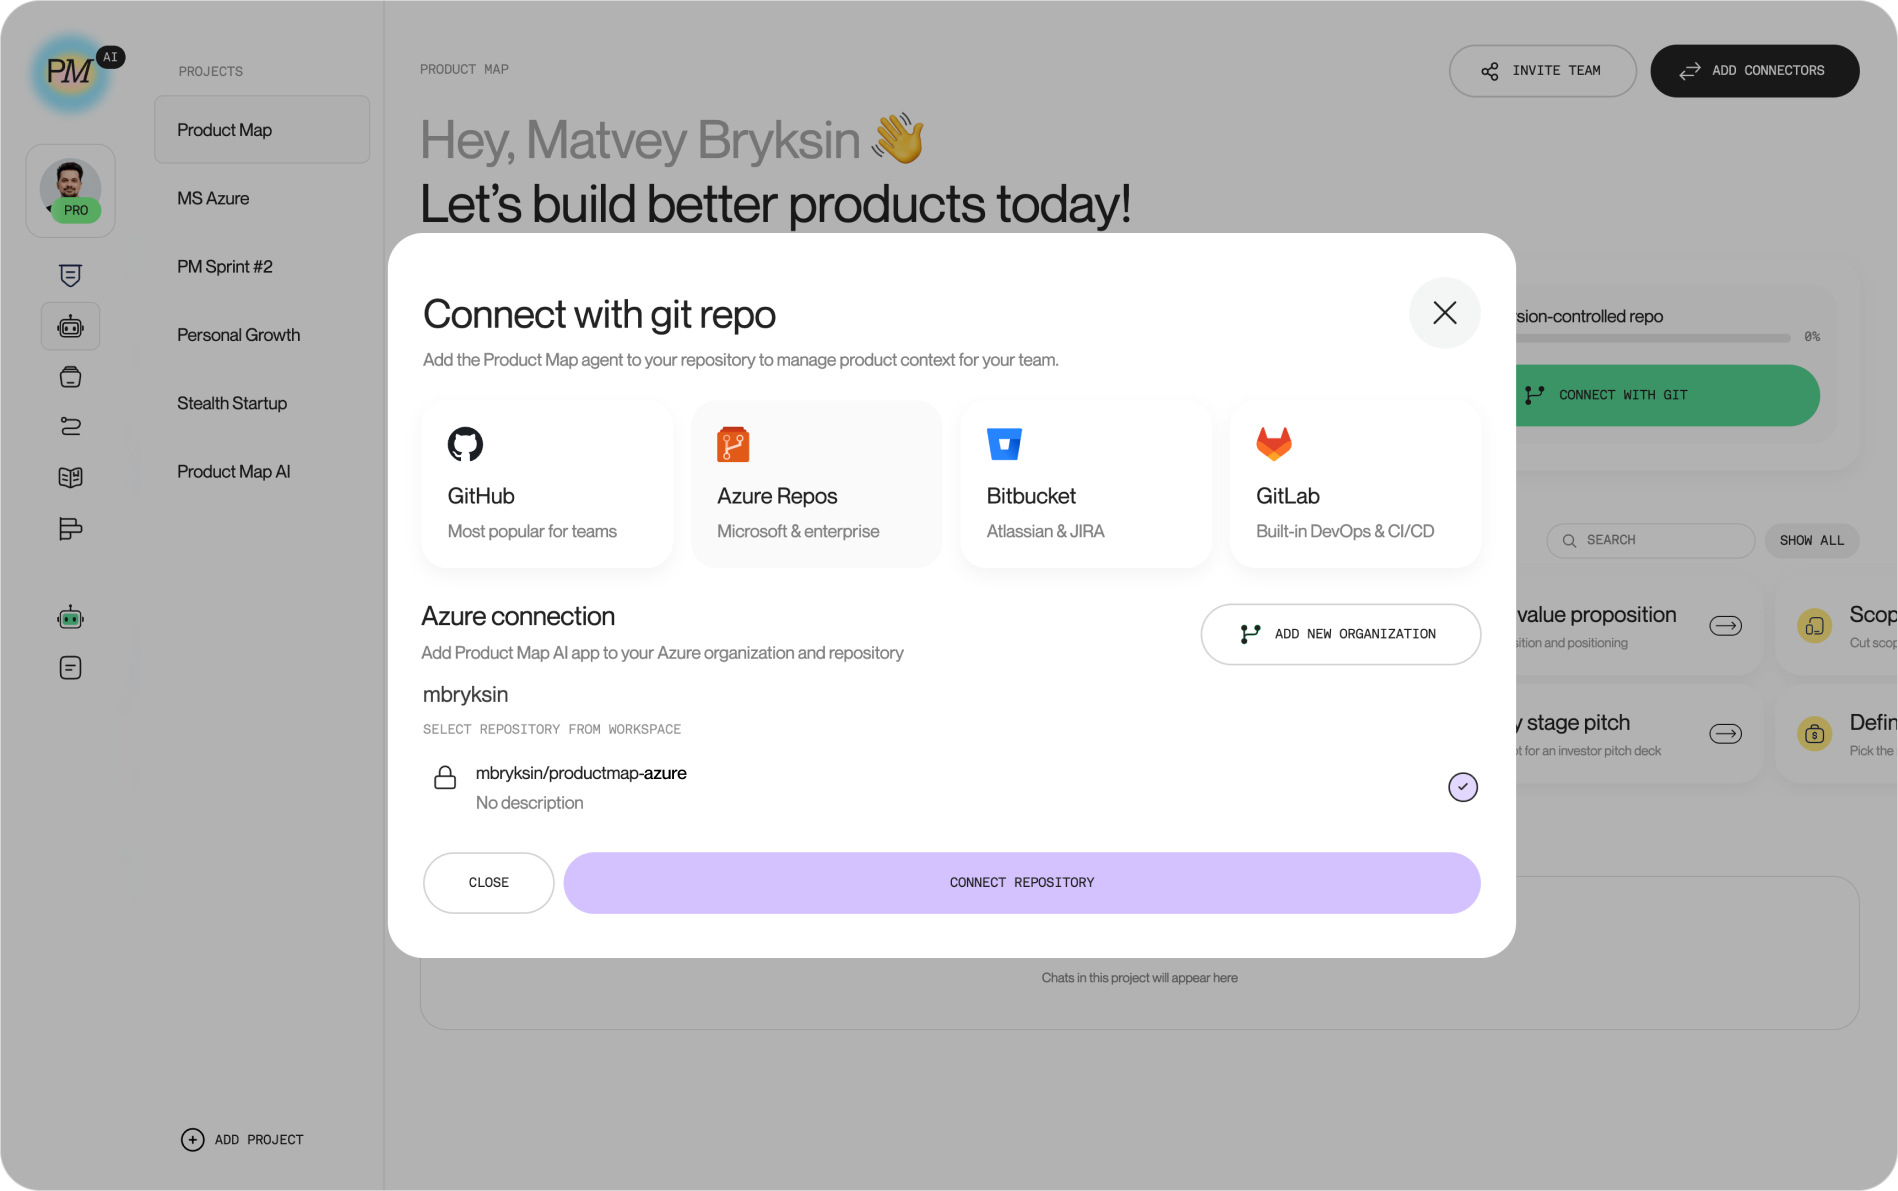
Back in the modal, your Azure DevOps organization appears as a heading, and every repository the account can see lists underneath it with a radio button, named as organization, project, and repository. Repositories already linked to another Product Map project carry a Connected badge and can't be picked twice.
Choose the repository that will hold this product's context and click Connect repository. Two toasts follow: one confirming the link, one confirming the first context publish was requested. The project page button reads Azure Repos Connected, and the knowledge base panel shows the .productmap folder with numbered domain folders and starter files like onepager.md. Product Map also registers a service hook on the repository, so commits people push from their own machines flow back into the knowledge base.
2. Set up the Microsoft 365 connection
The second phase brings SharePoint and OneDrive into chat. One card, one consent screen, one Microsoft account.
Open the Connectors catalog
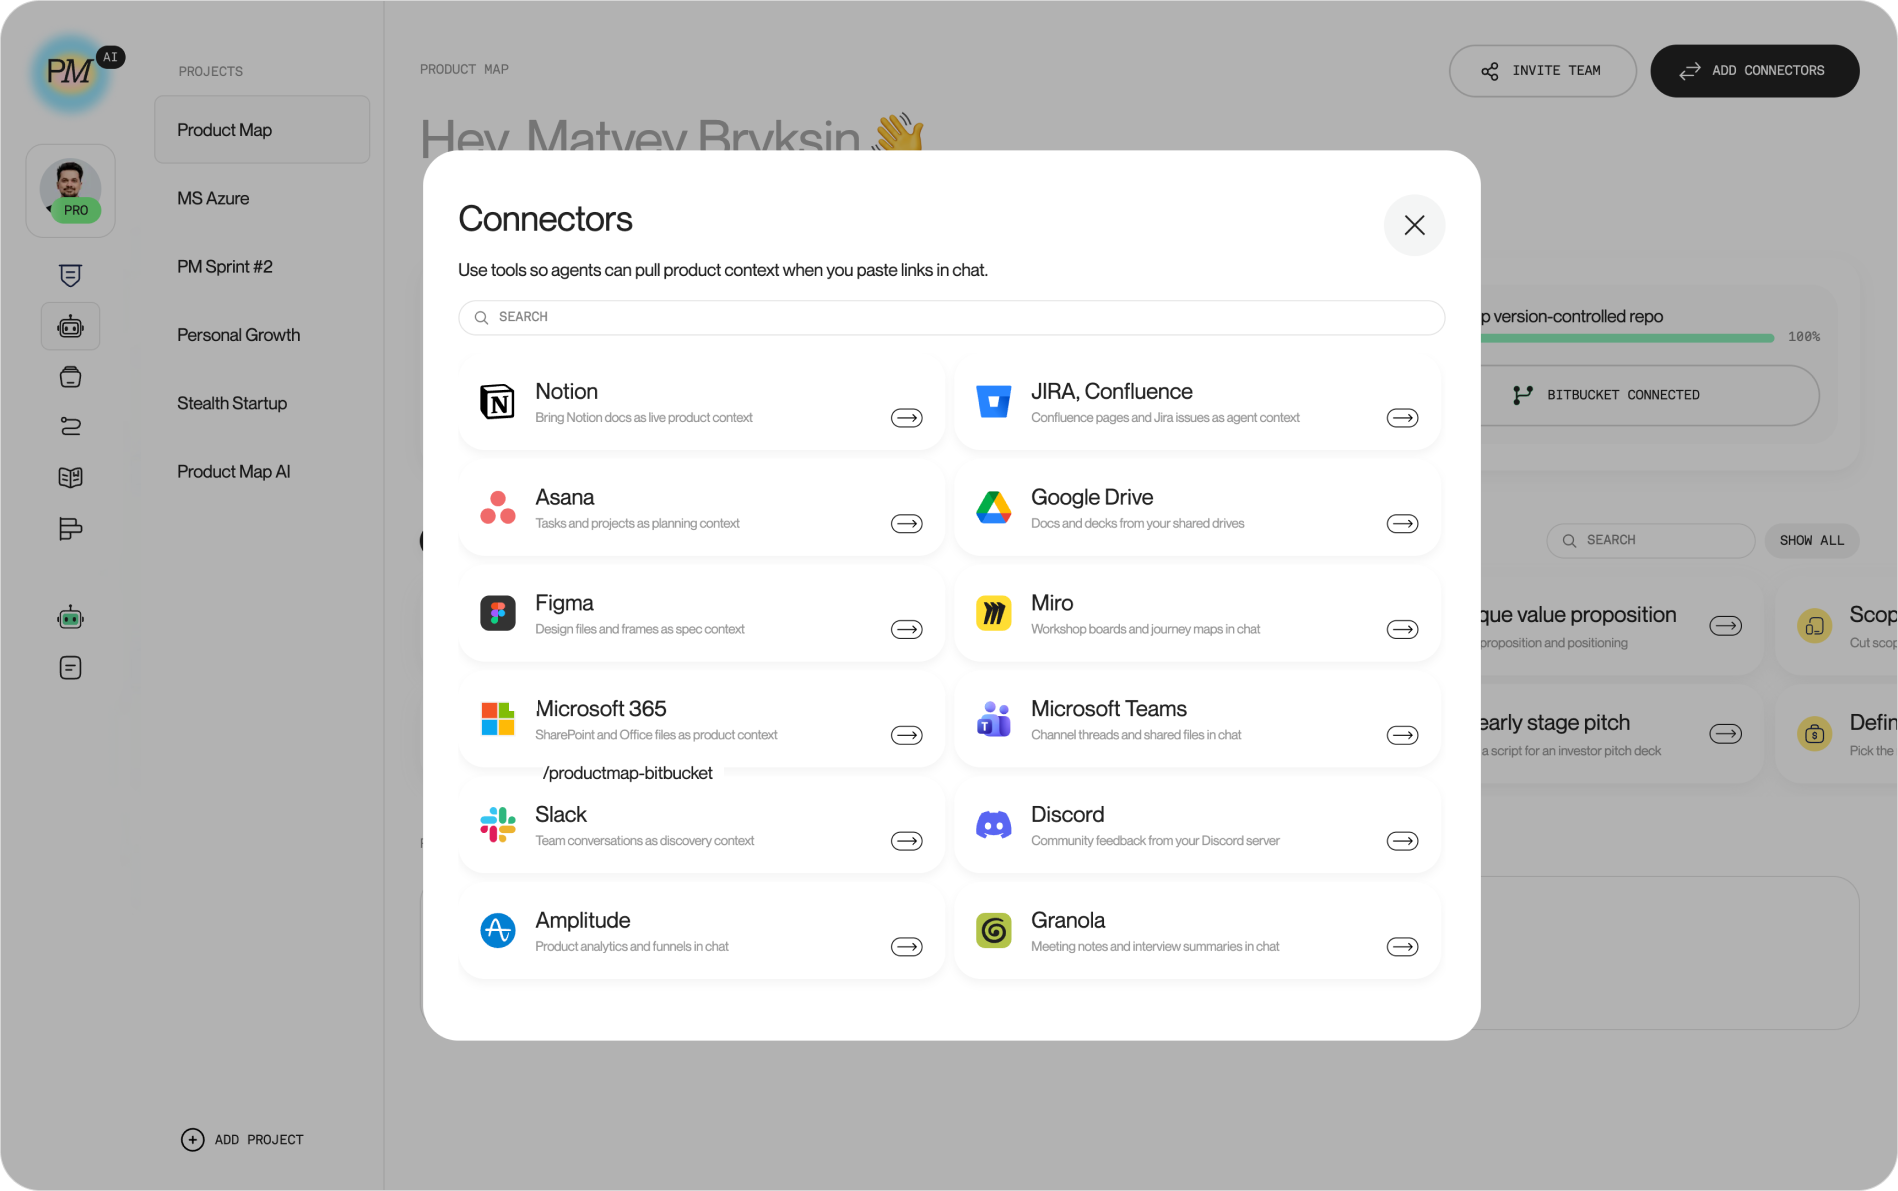
On the project page, click Add connectors in the header. The Connectors modal lists every source an agent can pull context from when you paste a link in chat: Notion, JIRA and Confluence, Asana, Figma, Miro, Slack, and two Microsoft cards: Microsoft 365 and Microsoft Teams. The same catalog sits inside any chat, under the Tools dropdown in the composer.
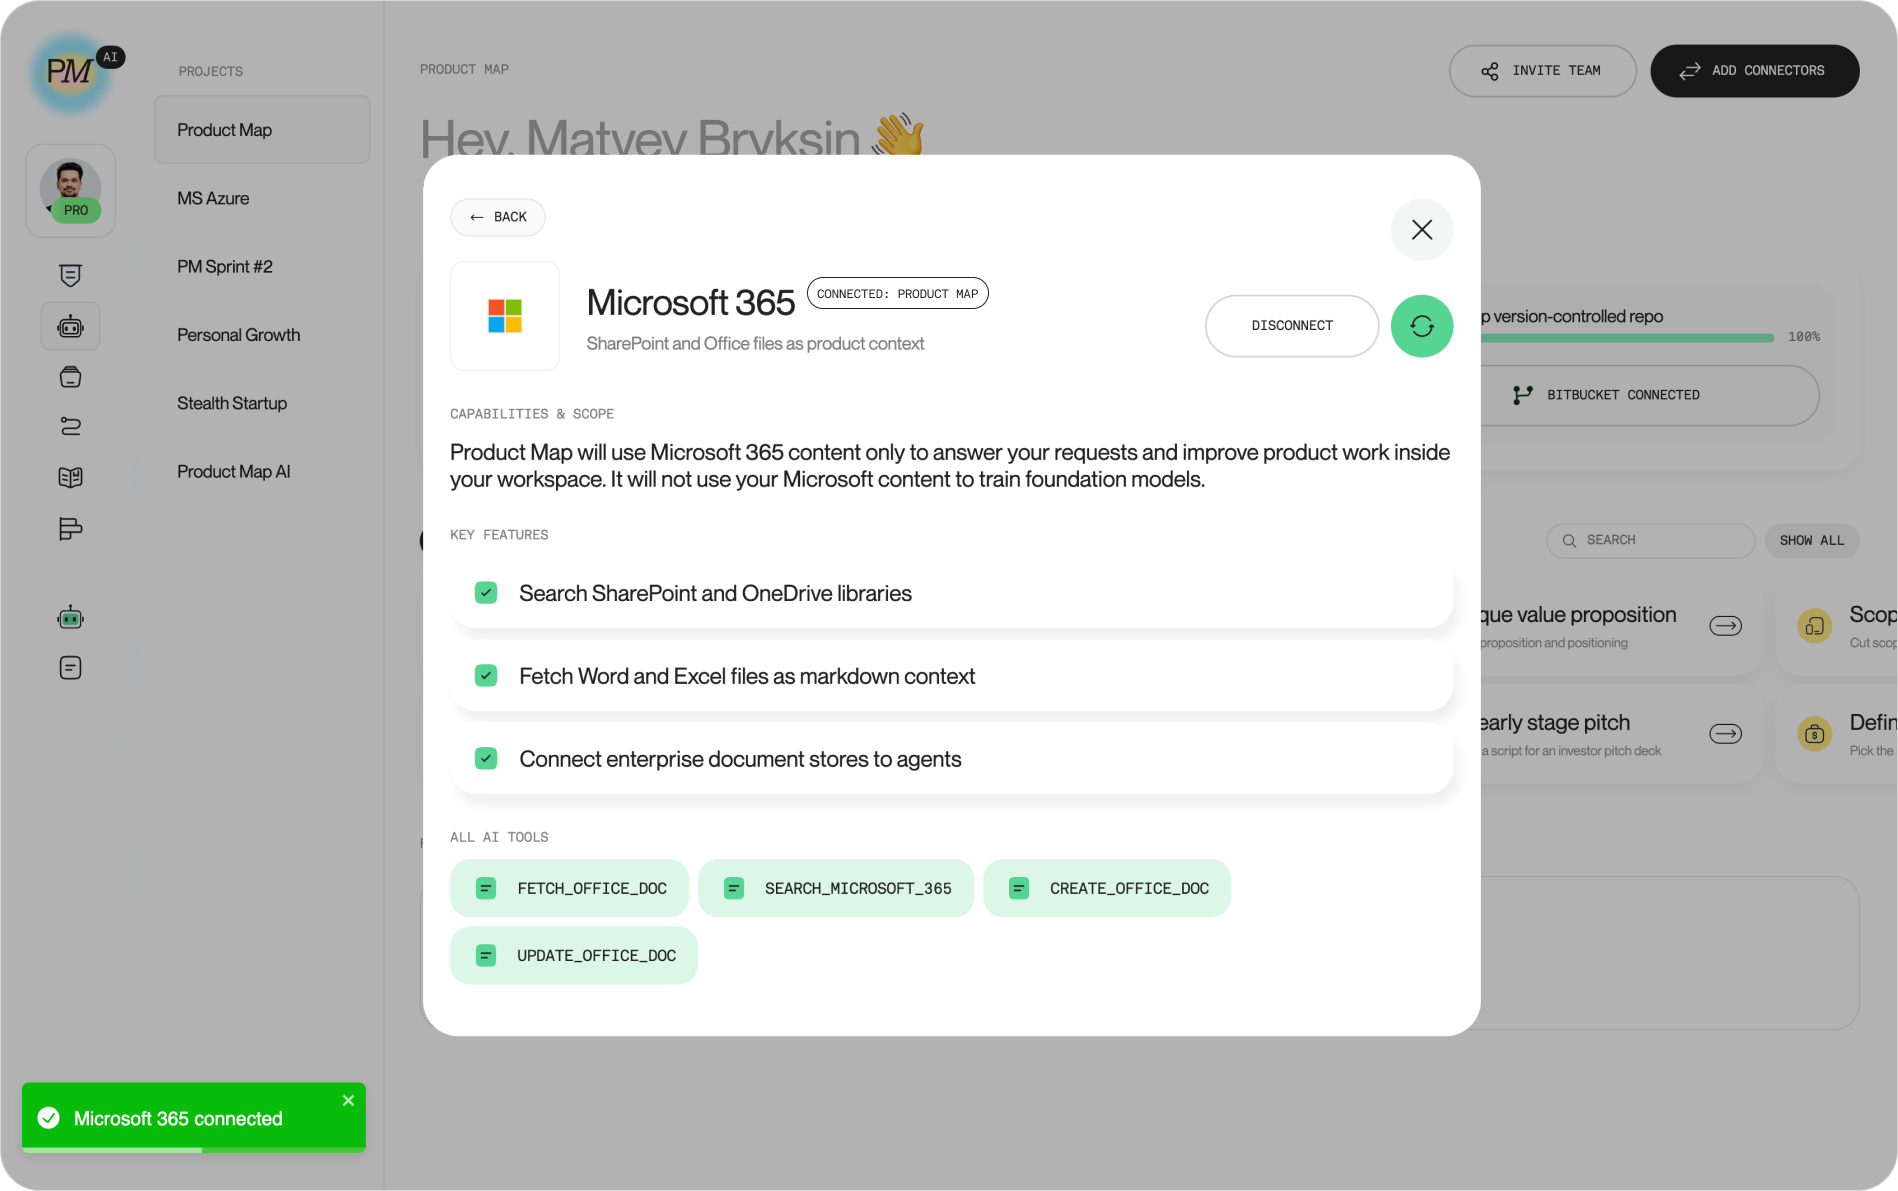
Open the Microsoft 365 card. The detail view lists three capabilities: search SharePoint and OneDrive libraries, fetch Word and Excel files as Markdown context, and connect enterprise document stores to agents. Below the capabilities sits the full tool set: FETCH_OFFICE_DOC, SEARCH_MICROSOFT_365, CREATE_OFFICE_DOC, and UPDATE_OFFICE_DOC.
Authorize Microsoft 365
Click Install connection. You land on the Microsoft account picker, then a consent screen for Product Map AI. The permissions read in plain English: sign in and read your profile, read all files you can access, read items in all site collections, have full access to all files you can access, and maintain access after sign-out. The write permission exists for one reason: the agent can save a Markdown file to your OneDrive when you ask. It never edits Office files. Only a project admin in Product Map can complete this step or disconnect it later.
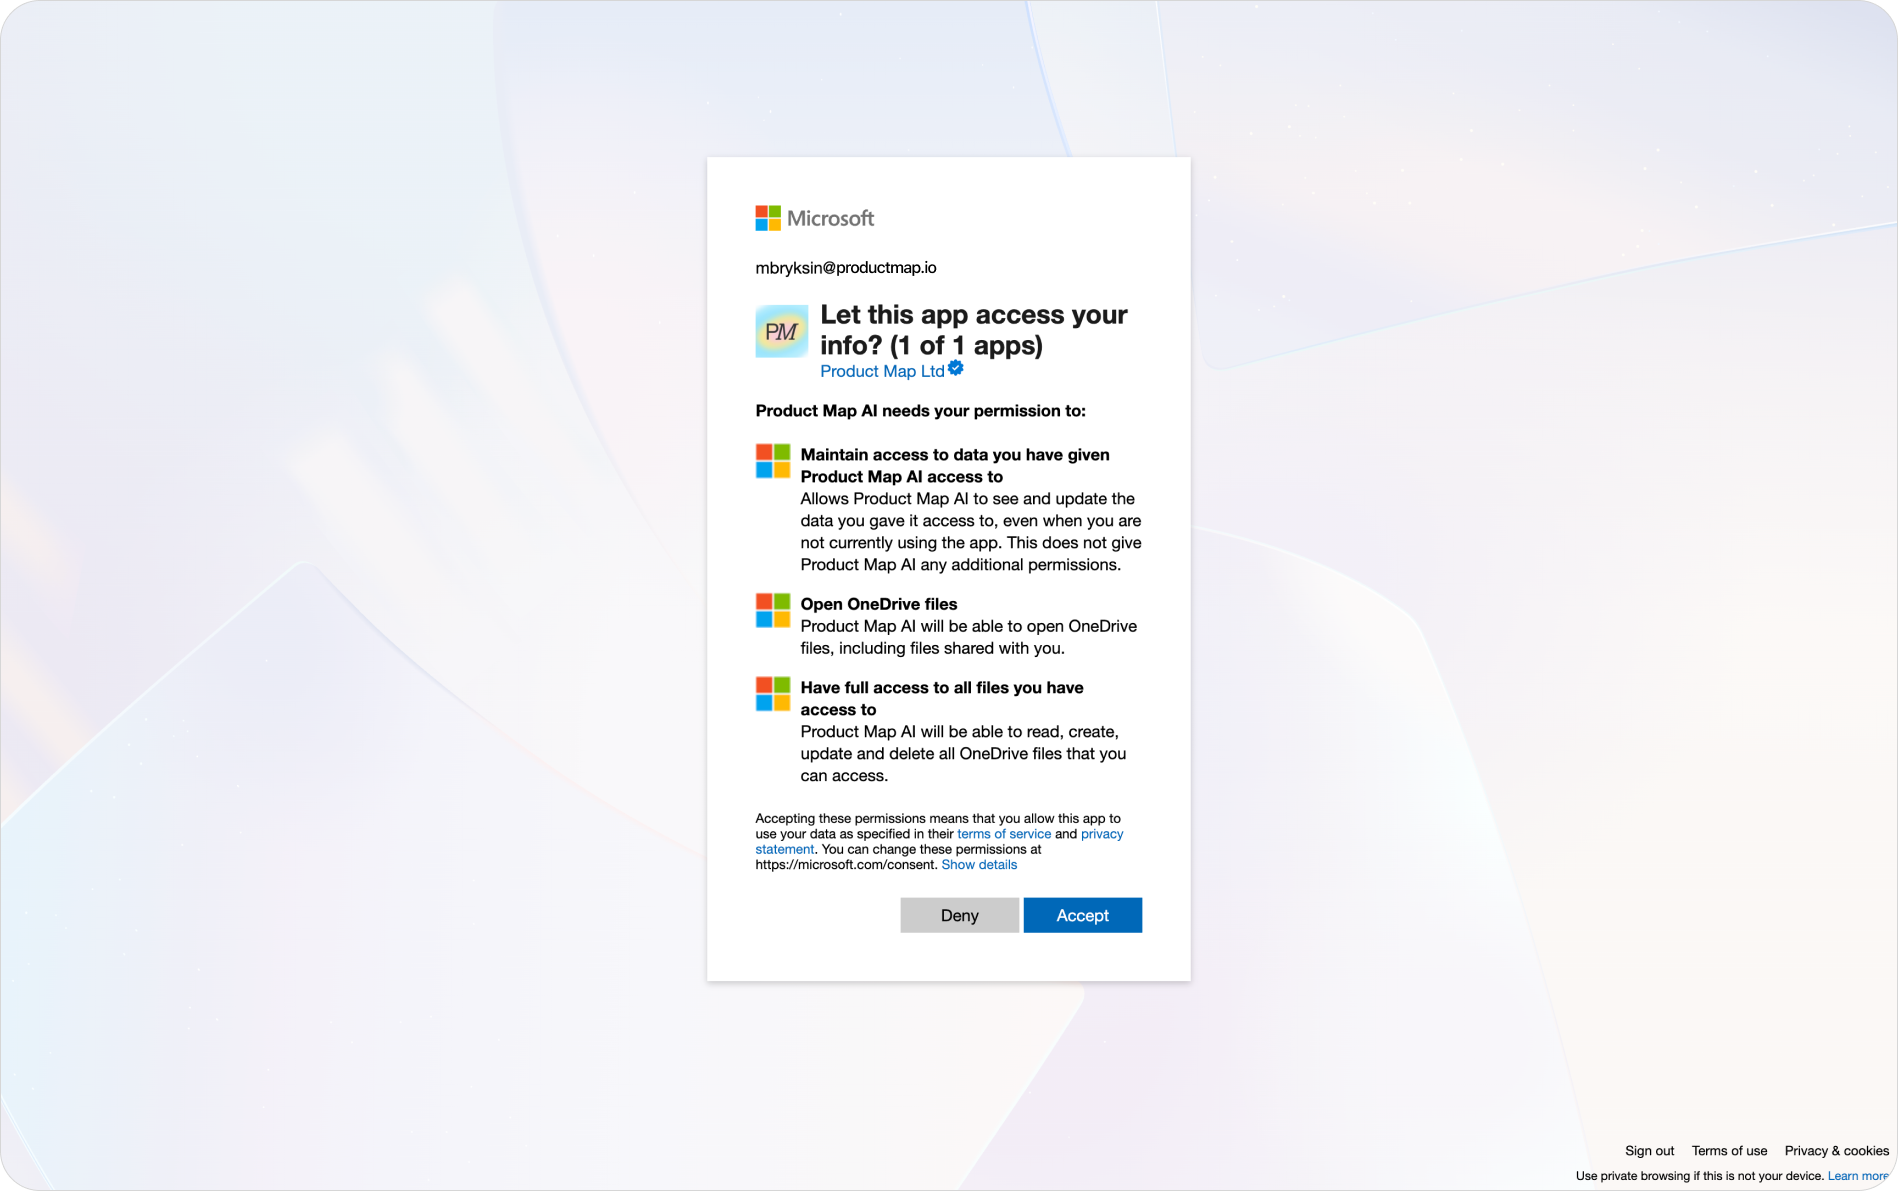
Approve, and Microsoft returns you to the Connectors modal. A toast reads Microsoft 365 connected, and the card shows a Connected badge with the email you signed in with. The detail view also states the data rule: your Microsoft content is used only to answer your requests, never to train foundation models.
3. Create a PRD from a SharePoint doc
Both connections are live. This phase exercises the Microsoft 365 fetch and the repository write gate before you save anything.
Paste the Word file link
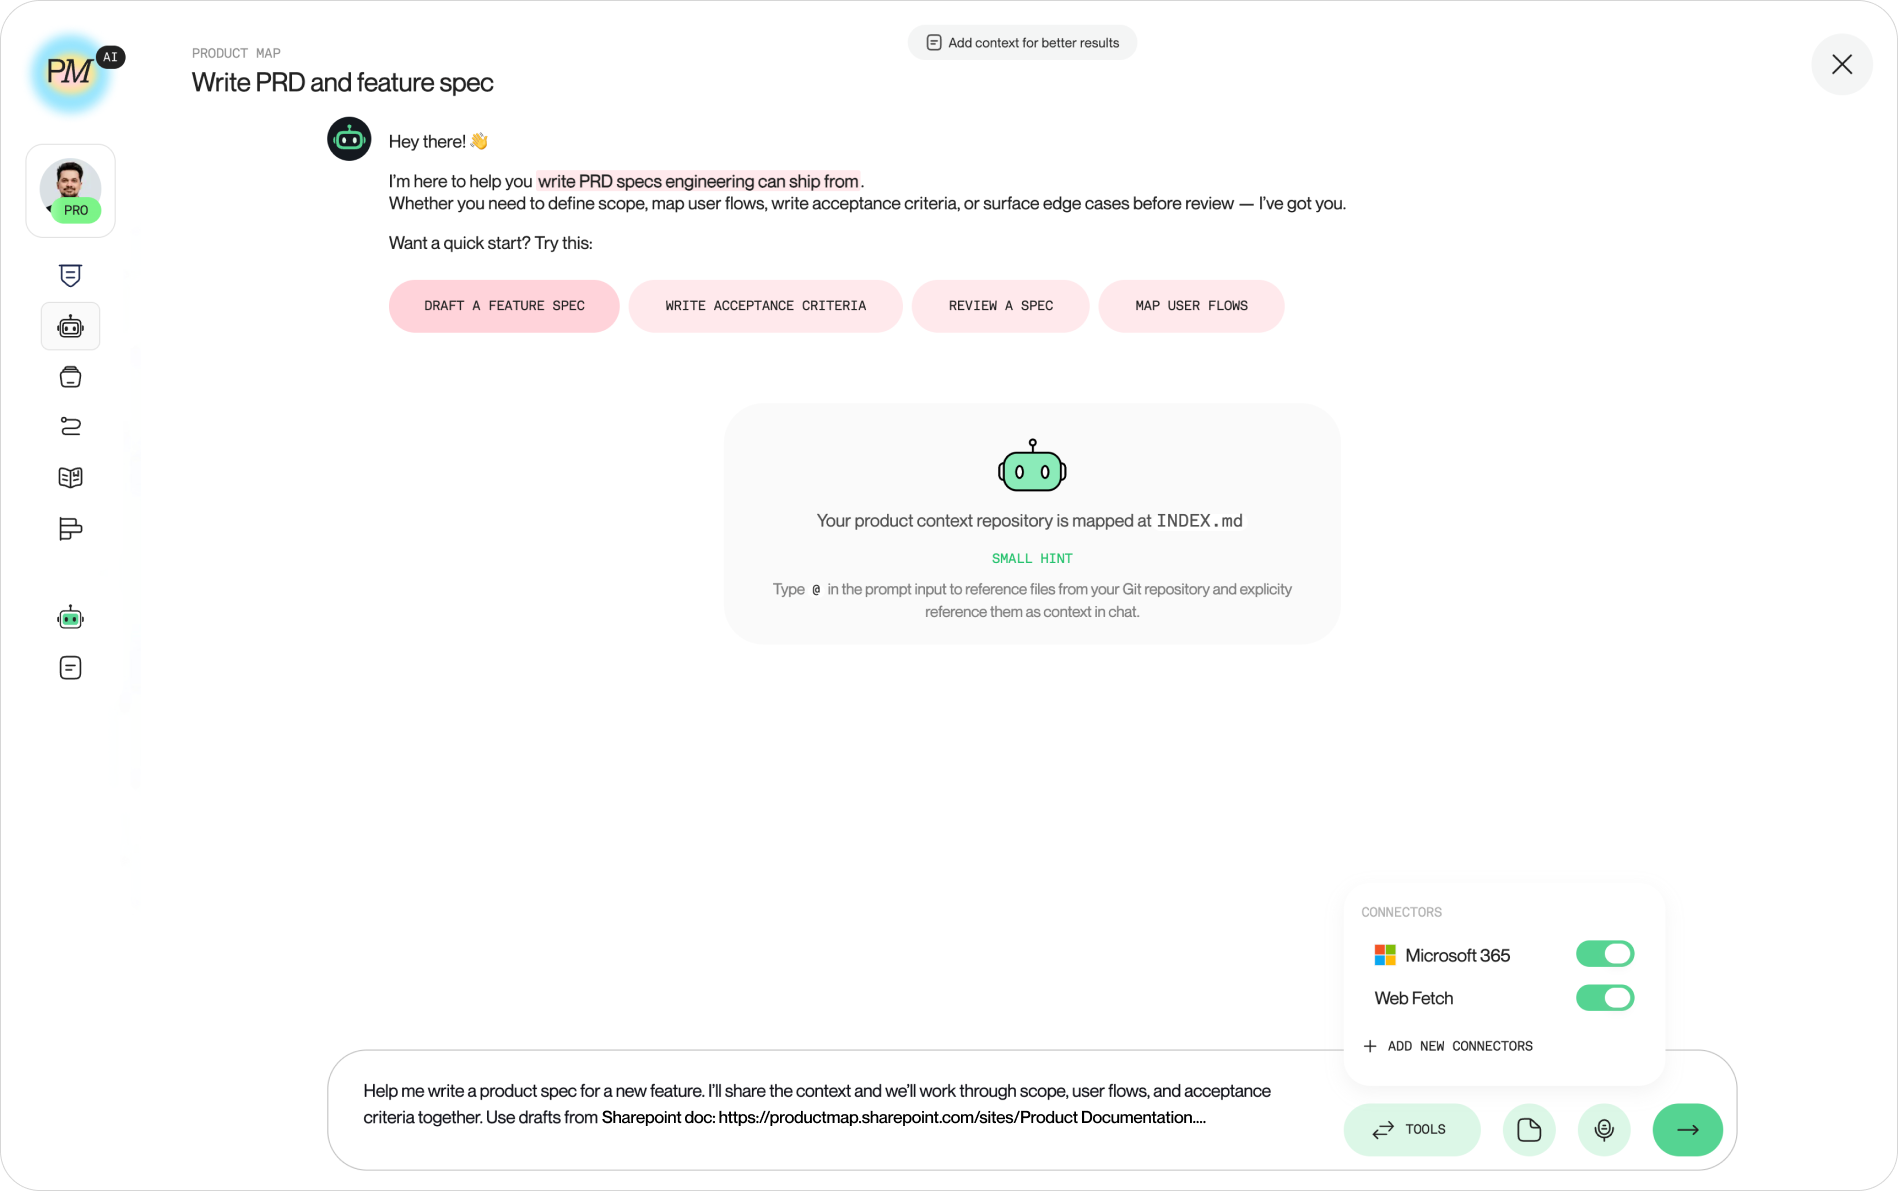
Open Write PRD and feature spec from the agent list, or any delivery agent in the project. In SharePoint, open the Word document holding the requirement, click Share, and copy the link.
Paste it into the composer and ask the agent to draft a spec from the document. A SharePoint link switches the Microsoft 365 tool on for that turn. Open the Connectors menu in the composer to confirm it is toggled on. Product Map fetches the Word file as Markdown and hands it to the agent as a marked external source before the model starts.
Review the drafted spec
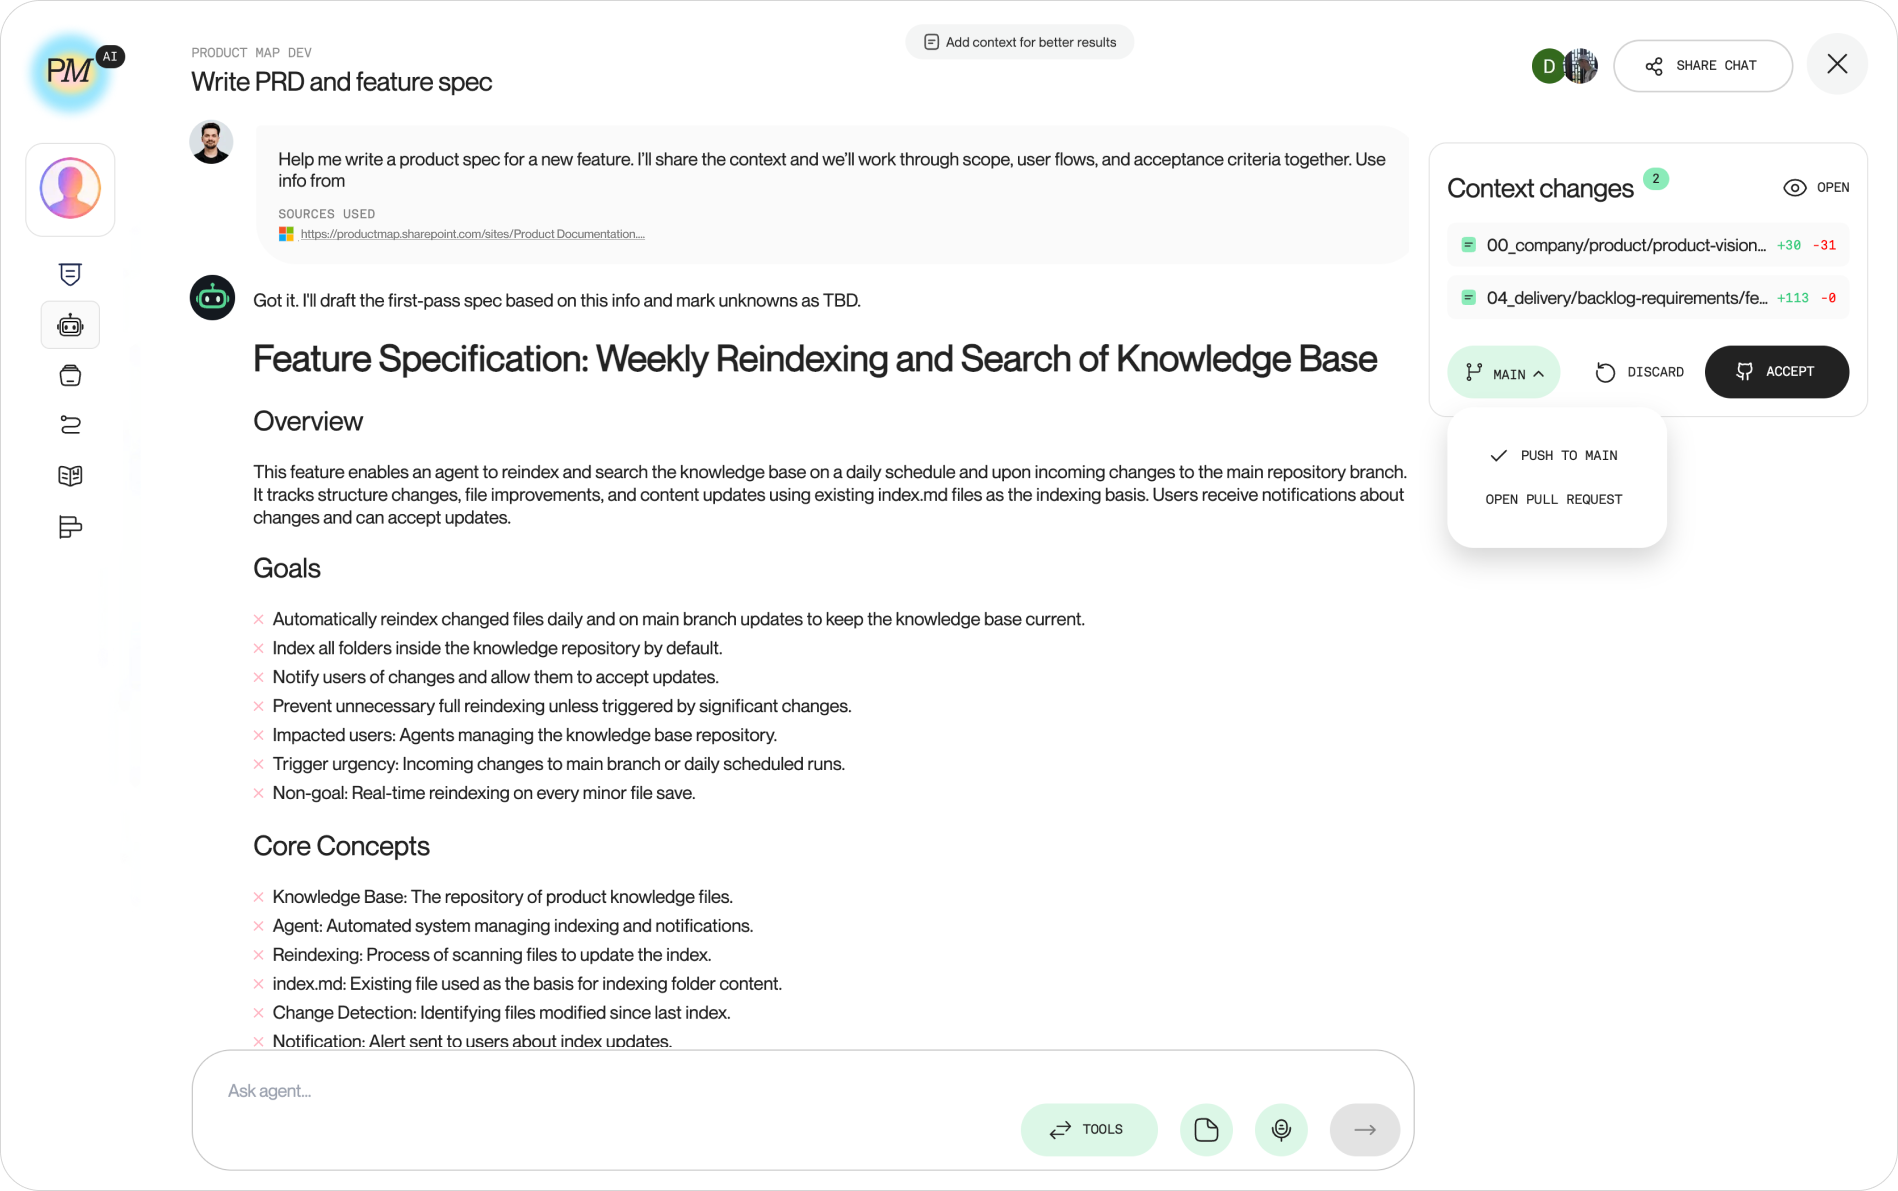
The agent returns a structured first-pass spec: overview, goals, non-goals, and core concepts from the Word file. Under the reply sits a Sources used row with a chip for the document title. If the chip reads "failed," the file is invisible to the account you authorized. Get it shared with that account, or reconnect with the right one.
Read the spec in chat before you move on. This is the point where you correct scope, fill gaps, or ask the agent to tighten acceptance criteria while the source is still attached.
4. Push context to Azure Repos and save a copy to OneDrive
The spec is ready. This phase commits the PRD and backlog updates to Azure Repos and, if the rest of the company still reads OneDrive, drops a copy there in one pass.
Accept context changes
As it drafts, the agent proposes repository changes. The Context changes panel on the right shows two pending files: an updated backlog.md and a new PRD under .productmap. Next to Discard and Accept sits a branch selector. Push to main commits straight to the default branch, which suits a solo project. Open Pull Request creates a branch and a pull request instead, the right setting once a second person writes to the repo, and the only one that works if a branch policy requires reviewers on main. Nothing touches Azure Repos until you click Accept, and only project admins can.
Confirm the commit in Azure Repos
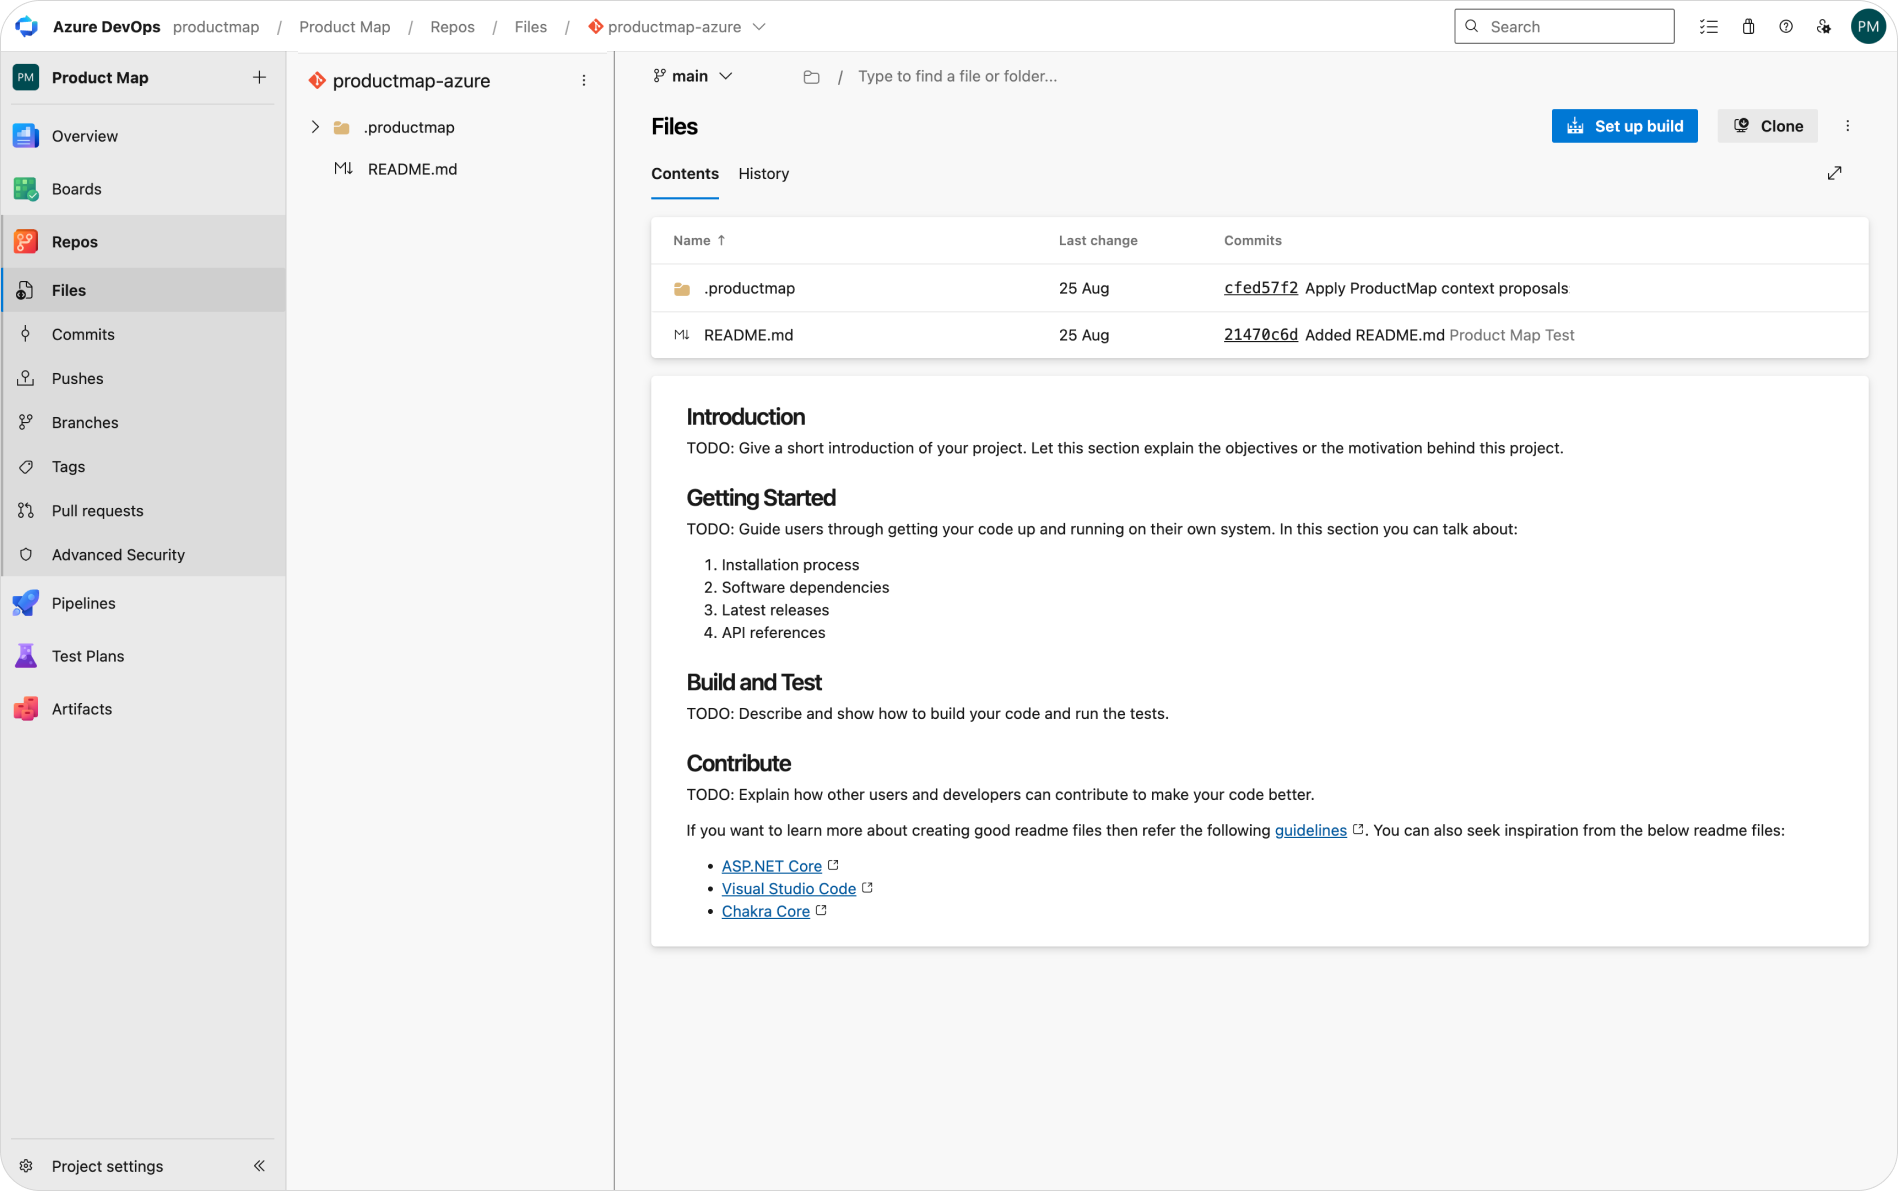
Click Accept. Open the repository at dev.azure.com and the .productmap folder is there under Files, committed by the Product Map AI app with a message like "Apply ProductMap context proposals," or waiting under Pull requests if you picked that mode. The backlog and PRD now live in Git alongside your code, and every agent in the project loads this requirement as Markdown files, not as Graph calls.
Save a Markdown copy to OneDrive
Stakeholders who live in Office won't open a Git repository to read a spec. In the next message, ask the agent to save the PRD to OneDrive as feature-spec.md. The connector creates the file in the root of the connected account's OneDrive and replies with the share link. After a revision, ask it to update the same file and it rewrites the Markdown in place. The connector reads Word, Excel, PowerPoint, and PDF, and writes only text formats: .md, .txt, .csv, and .html.
Open All Agents
Back in Product Map, click through to All Agents to see the full catalog grouped by category: Strategy, Generation, Analysis, Delivery, and People. Each card names a specific task instead of a vague capability, so picking one reads closer to assigning a work item than prompting a chatbot. With Azure Repos and Microsoft 365 connected, every agent in this list reads from the same repository and can pull SharePoint links you paste in chat.
.png)
The question nobody answers: who approves the consent screen
In a Microsoft shop the blocker is rarely the product. It is the tenant. Entra ID lets an admin restrict which apps users can consent to, and many enterprise tenants ship with user consent switched off for apps from outside the organization. When that setting is on, the consent screen in phase 2 doesn't show Accept. It shows Approval required, with a box to justify the request to IT.
Plan for that before you start. Two moves shorten the wait:
- Send the scopes ahead of the request. Microsoft 365 reads files and sites you can already open, plus write access to your own OneDrive. Azure Repos acts as you inside the organization. Nothing runs as an application; everything is delegated to the signed-in person.
- Ask for admin consent once, tenant-wide. A Global or Application administrator can grant the permissions for the whole tenant from the Entra admin center under Enterprise applications. After that, every PM on the team gets a plain Accept screen, or no screen at all.
The second question is the one every team hits: after phase 4 the requirement exists in three places, the Word file, the OneDrive copy, and the Markdown in the repo. The repository copy is the one agents read, so it has to be the one you keep current. SharePoint is where people write and comment. When a document is ready, someone pastes the link, an agent proposes the file, a reviewer accepts it. Later edits mean a second paste and a second diff. The OneDrive copy is a courtesy for readers, never a source. What fails is drift, where a work item gets scoped from a PRD nobody has re-fetched since June. The review gate exists so a person notices. Use it.
Do the setup once per product
Fifteen screens, one product. Afterward the loop is short: write in Word, paste the SharePoint link, accept the file. Each pass adds one reviewed Markdown file to a repository every agent on the team already reads. Six months of that and the .productmap folder in Azure Repos holds a better record of the product than any SharePoint site.